Data Bucket Guide: Message-Receiving Type
Before starting
One issue you’ll face when trying to use IoT for your business is figuring out how to save the data you collect from IoT devices into servers or the cloud. Usually this requires technical knowledge to set up, or time and cost to hire someone to do it for you.
The Data Bucket fixes these problems by making it simple for anyone to quickly set up their own system for collecting and storing data into the cloud.
For storage, the Data Bucket uses Google’s highly-secure Google Cloud Platform open_in_new, giving you access to the fastest Big Data processing available.
What is a Data Bucket?
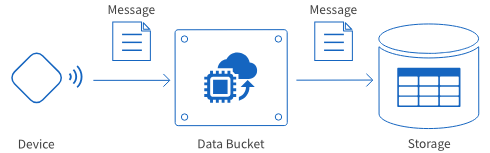
Data Buckets provide a system for collecting data from IoT devices and storing that data into the cloud.
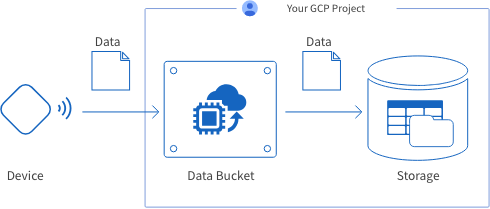
BLOCKS creates this system automatically within your Google Cloud Platform (GCP) project, but creating a Data Bucket does not require specialized knowledge of GCP.
warning Because the Data Bucket creates its system within your GCP project, GCP service charges will apply separately from BLOCKS fees.
There are two types of Data Bucket based on the type of data transferred.
| Type | Explanation |
|---|---|
| Message-receiving |
|
| File-receiving |

|
How to create a Data Bucket
This page explains how to create a message-receiving Data Bucket.
For information regarding file-receiving Data Buckets, refer to Data Bucket Guide: File-Receiving Type.
Note for Self-Service Plan (Free Trial) users:
-
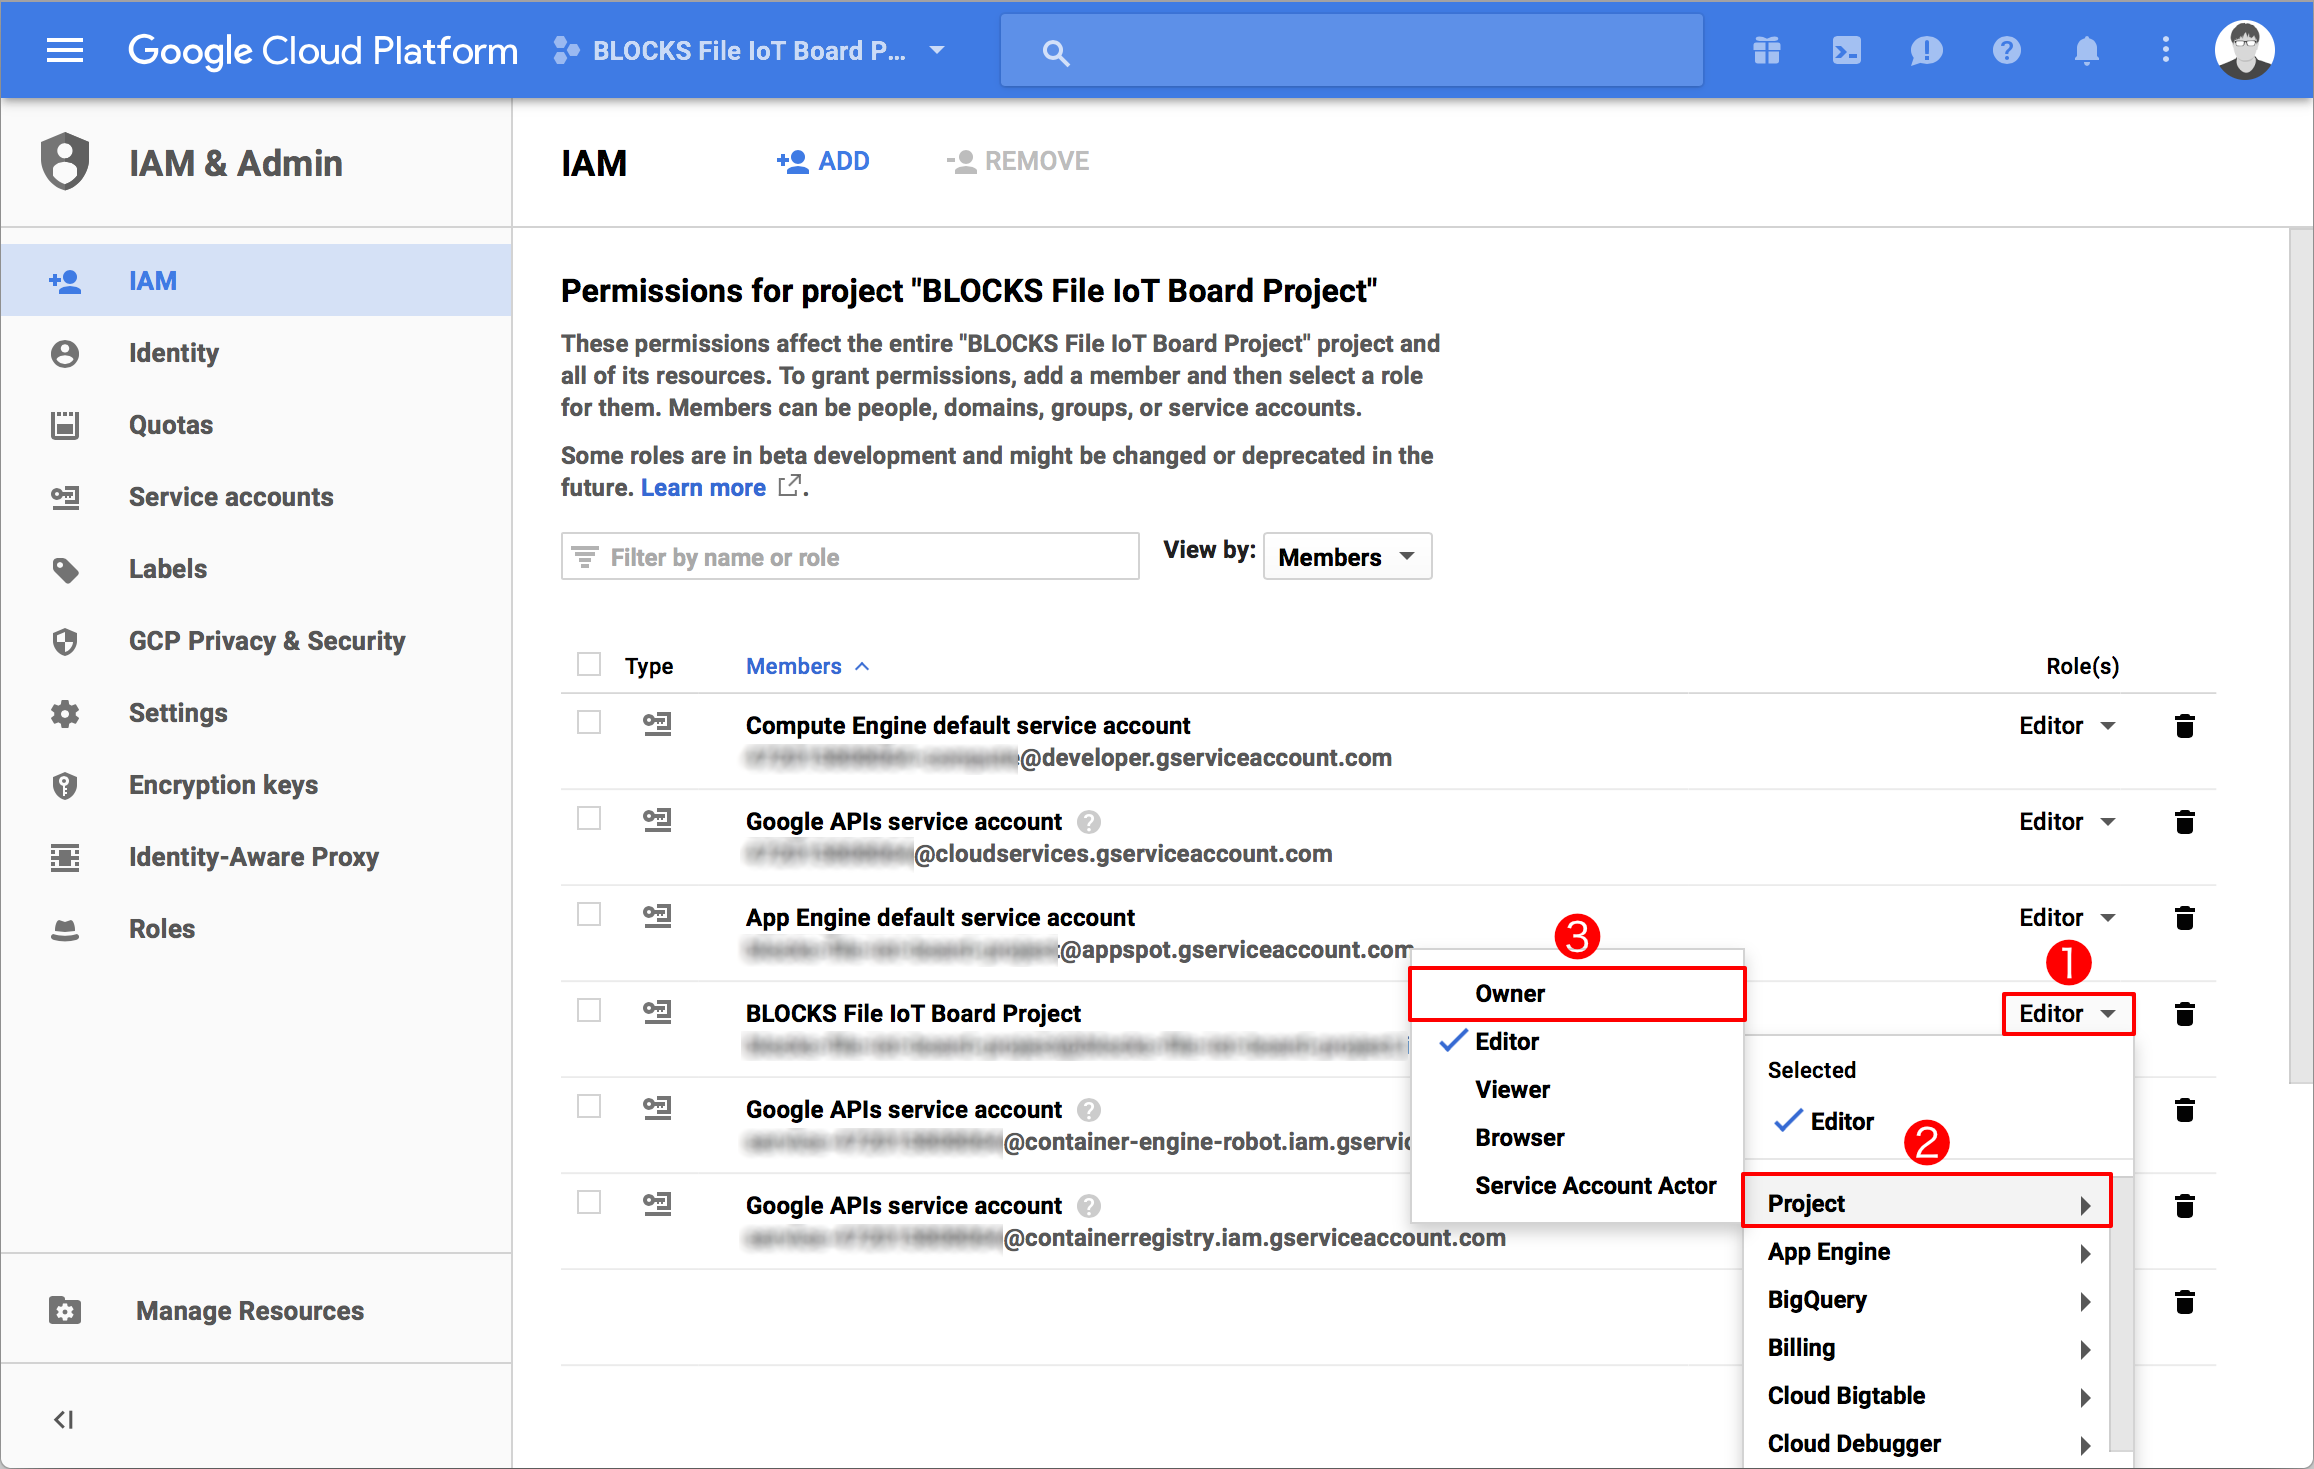
The GCP service account used with a Data Bucket must be given owner privileges.
If the GCP service account does not have owner privileges, access the IAM page in the GCP console open_in_new and change the relevant GCP service account’s role to Owner (Steps 1 → 2 → 3 in the image below).
General outline for creating Data Buckets
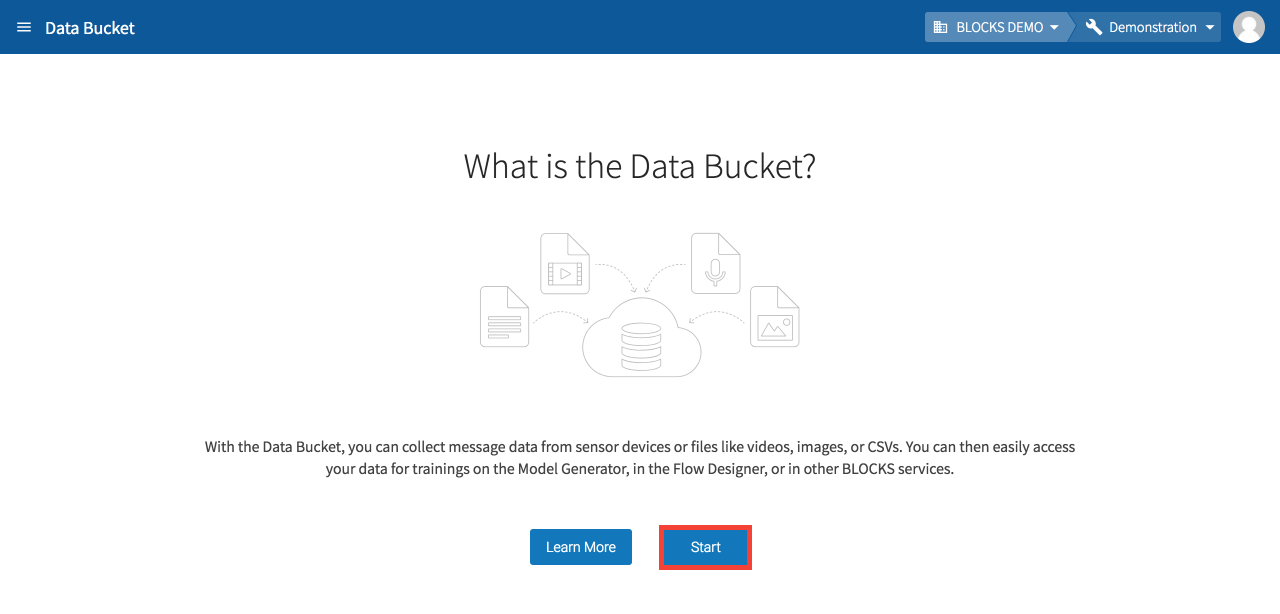
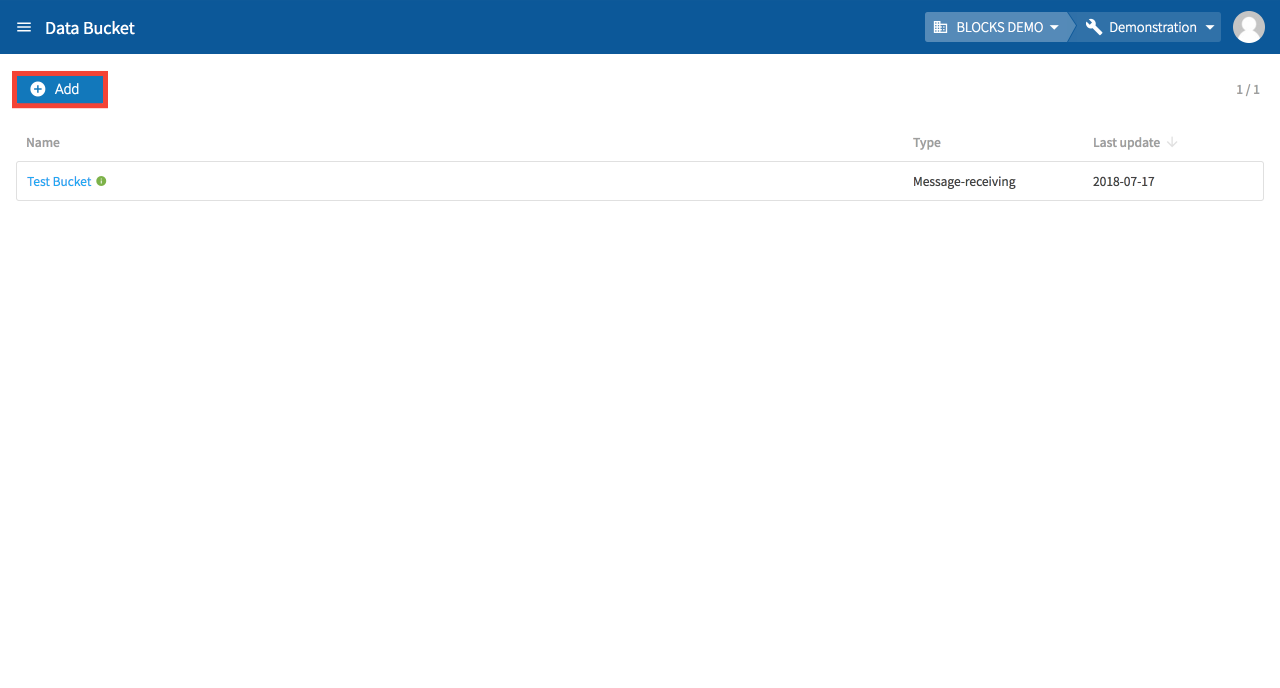
To create a new Data Bucket, either click the Start on the “What is the Data Bucket” screen, or Add from the Data Bucket list.
The general steps for creating a Data Bucket are as follows:
- Create a new Data Bucket
Select the type of Data Bucket and give it a name. - GCP service account settings (Self-Service Plan users only)
Designate the GCP service account to be used with the Data Bucket. - Entry point settings
Configure the destination for data sent from devices to the Data Bucket. - Processing settings
Configure how the Data Bucket will process data it receives. - Storage settings
Configure how the Data Bucket will store the data it has received and processed. - Confirmation
Review your settings and create the Data Bucket.
Each of these steps will be explained in more detail below.
Create a new Data Bucket
If you don’t have any Data Buckets created, click Start on the screen that says, “What is the Data Bucket?”
If you have at least one Data Bucket created, click Add at the top of the Data Bucket list.
info_outline A message will appear if your organization does not have sufficient licenses to create the Data Bucket. If you are an admin for your organization, you will be prompted with instructions on how to to purchase an additional license. If you are not an admin, you will be prompted to contact your admins.
Select the type of Data Bucket to create and click Next.
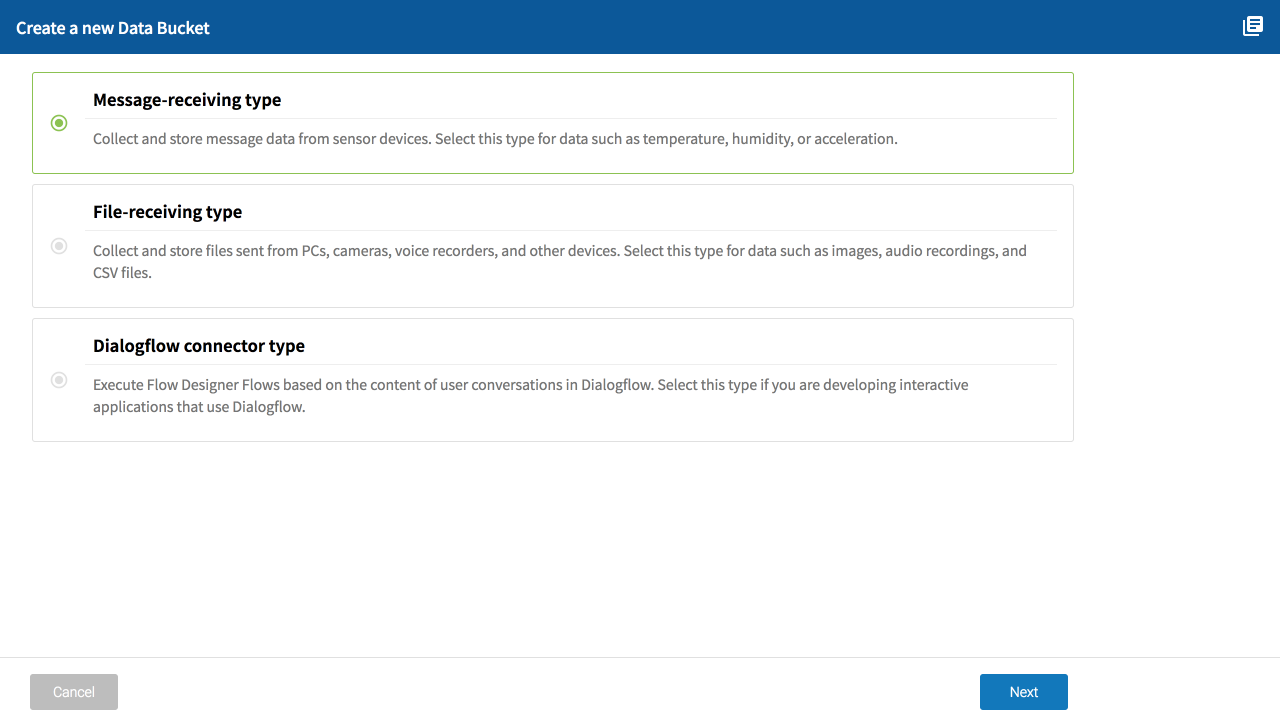
Refer to the following for information about each type:
| Type | Explanation |
|---|---|
| Message-receiving type |
|
| File-receiving type |
|
Enter a name for the Data Bucket.
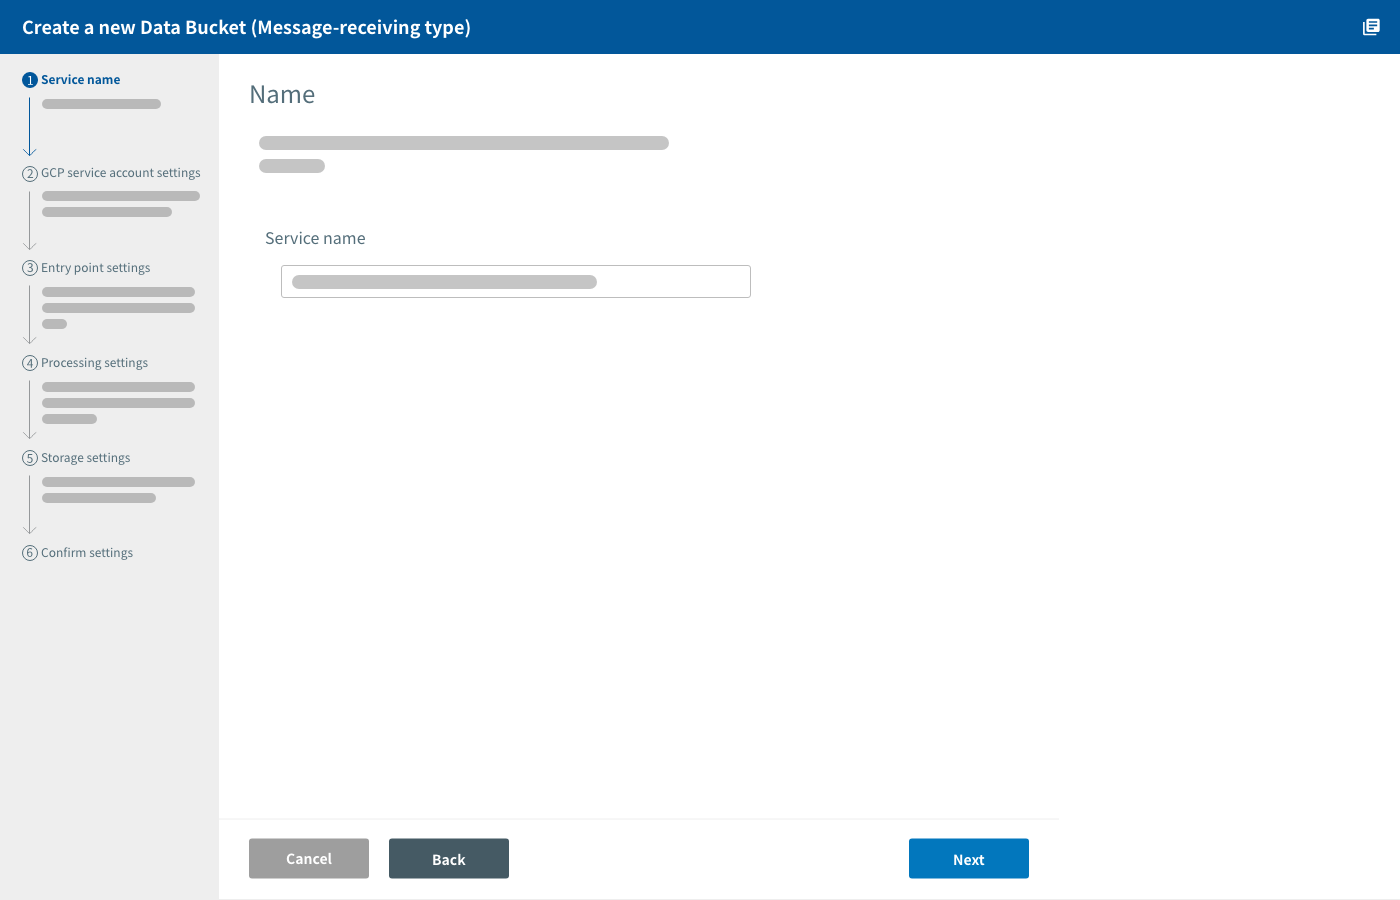
Click Next.
GCP service account settings
info_outline This step is for Self-Service Plan users only.
In this step, you will select your GCP service account and enable APIs required for using GCP services.
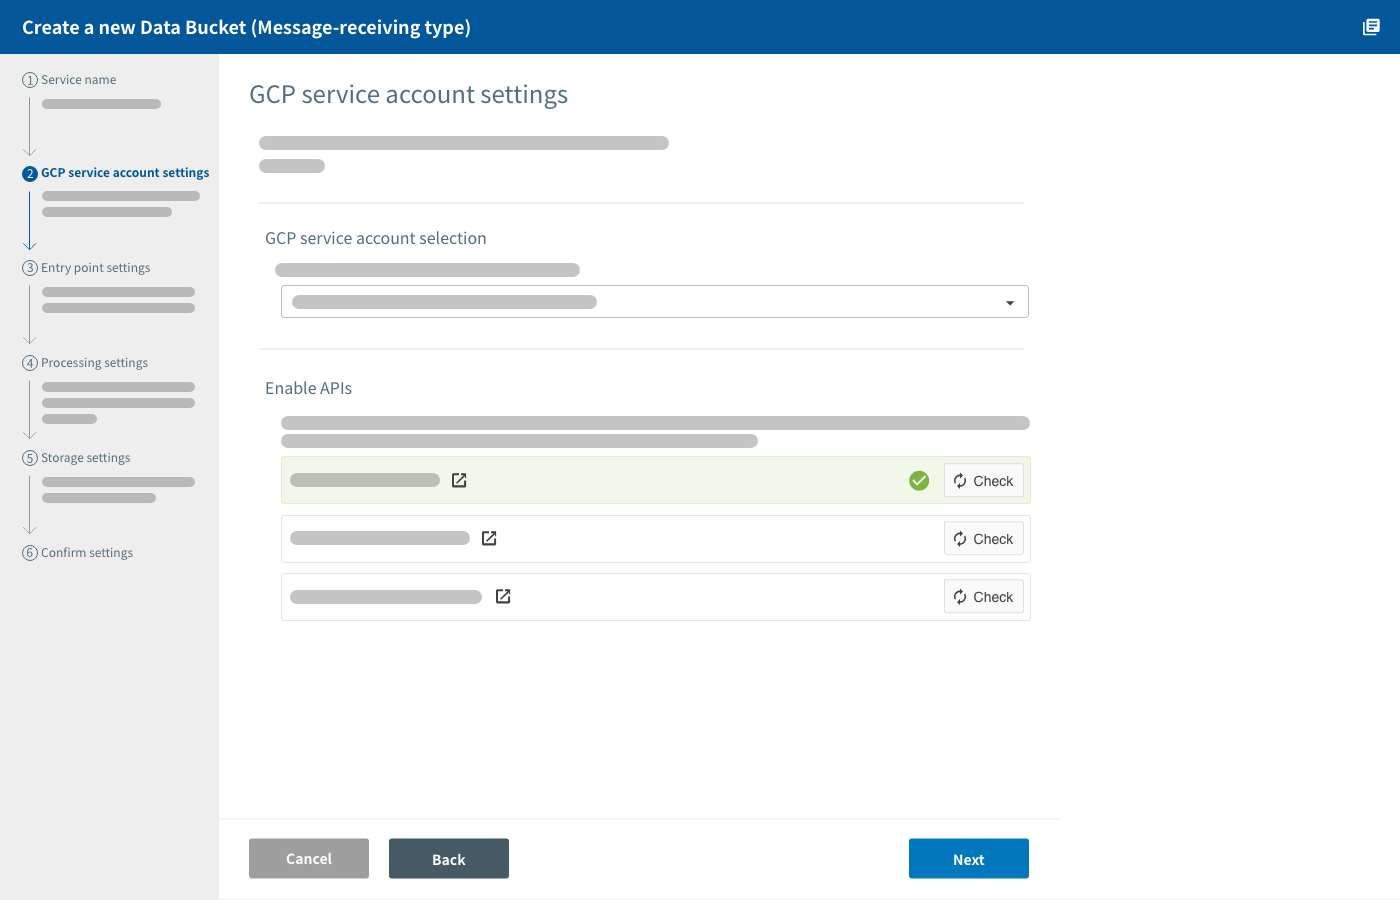
Select a GCP service account
BLOCKS automatically creates and manages the environment for the Data Bucket within your GCP project. A GCP service account with the Owner role is required for BLOCKS to be able to do this.
Select a GCP service account with the owner role.
info_outline For help creating a GCP service account, refer to Creating a Google Cloud Platform service account. The example on that page creates a service account with the “Editor” role, but GCP services accounts to be used with Data Buckets should be set to Owner.
Enable APIs
Do the following if there are any APIs that do not have a checkmark (check_circle) next to their loop Check button:
- Click Enable All APIs.
- The GCP console will open.
- Click Continue in the GCP console.
- Once the message The APIs are enabled appears, close the GCP console and return to BLOCKS.
Click loop Check for any API that does not have a checkmark (check_circle). Confirm that a checkmark appears for the API. Repeat this process for any APIs without a checkmark.
If the checkmark does not appear, try clicking loop Check again and waiting for a moment. This can sometimes take a bit of time. If the checkmark still does not appear, repeat the following:
- Wait a moment.
- Click loop Check.
If you still see a info_outline, the issue could be the following:
-
Your GCP service account is not set to the Owner role:
Open the menu (menu) in the upper-left corner of the GCP console open_in_new. Hover your cursor over IAM and admin and click IAM. Confirm that your service account’s role is set to Owner. If not, change it to owner.
-
Billing is not enabled for your GCP project:
Open the menu (menu) in the upper-left corner of the GCP consoleopen_in_new. Click Billing. If you haven’t already done so, enable billing for your project.
Click Next.
Entry point settings
In this section, you configure the entry point URL for your Data Bucket.
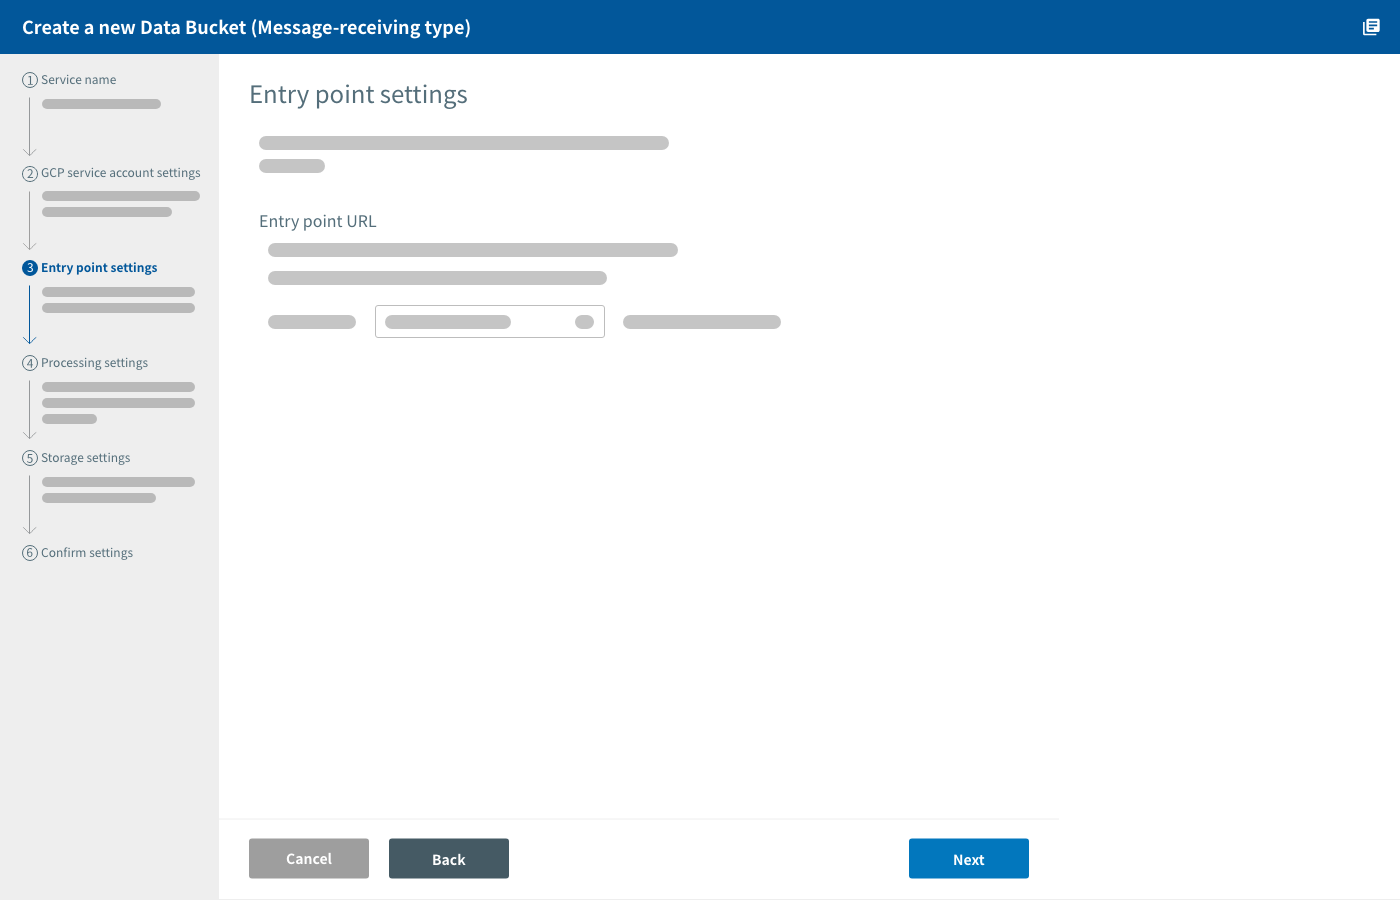
The entry point URL is where data is sent on its way from devices to the Data Bucket. Use the HTTP POST method to send data from devices to this URL.
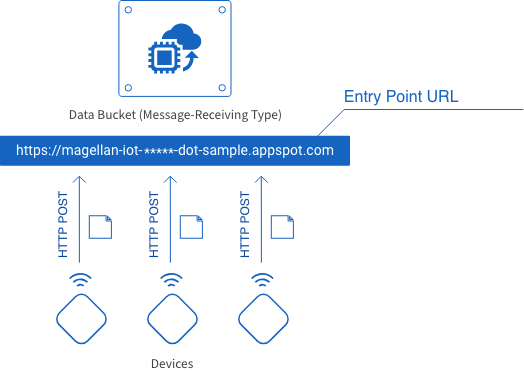
Entry point URLs are formatted as shown below. Only one portion can be configured by the user.
https://magellan-iot-<*****>-dot-<project ID>.appspot.com| Item | Explanation |
|---|---|
| <*****> |
A string of characters used to specify the Data Bucket’s entry point. You can configure this portion. It’s set as a random 16-character string by default.
When creating several Data Buckets for one GCP project, be sure not to use the same string more than once. |
| <Project ID> | This is set automatically to your GCP Project ID and cannot be changed. |
Click Next.
Processing settings
In this section, you configure settings related to how the Data Bucket will process the data.
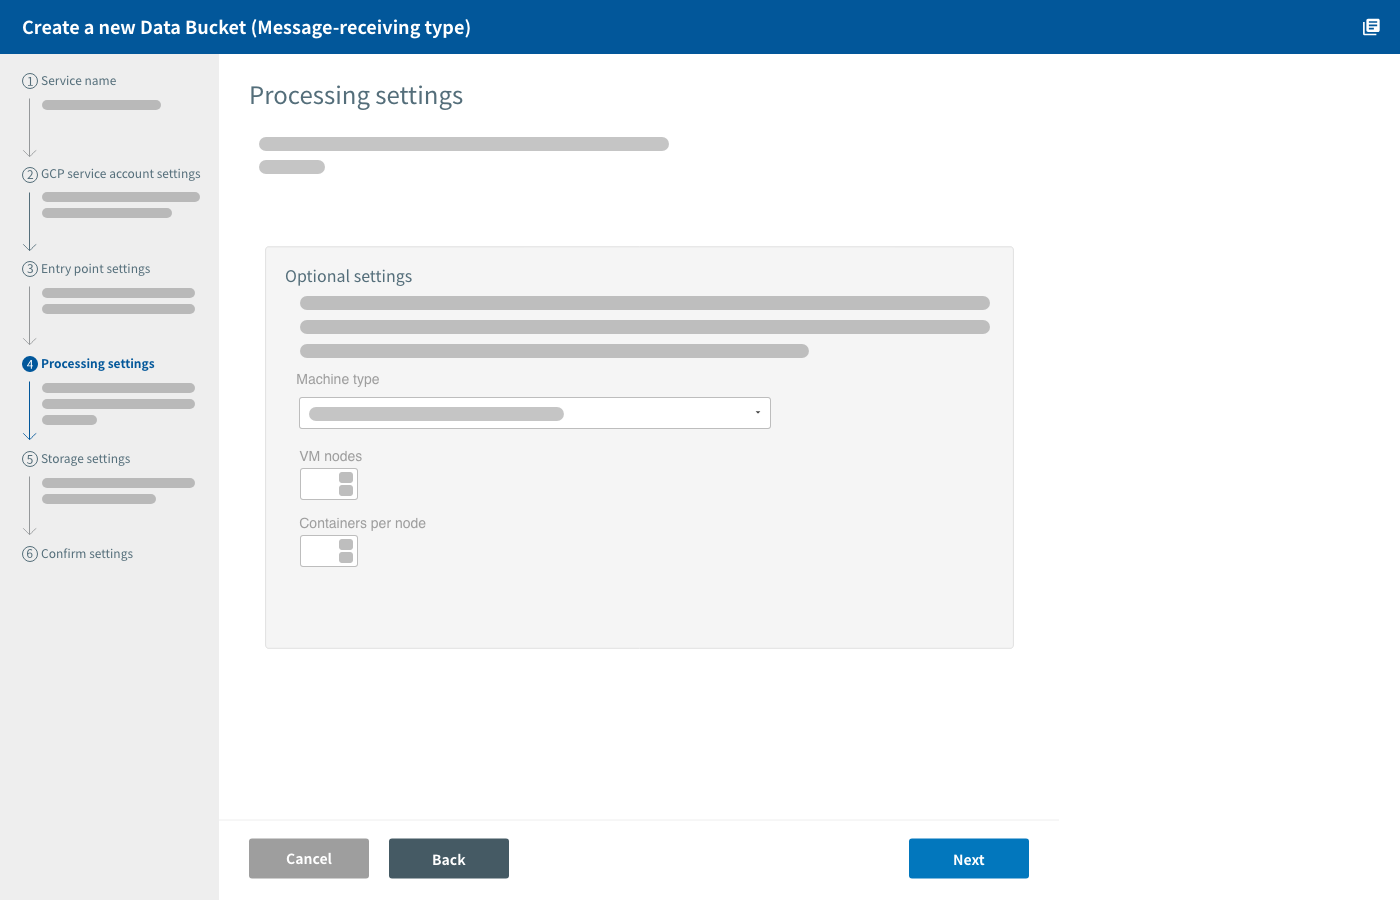
If desired, you can configure the following Google Container Engine (GKE) related settings:
| Setting | Explanation |
|---|---|
| Machine type |
Designate the type of virtual machine to be used.
The default setting is n1-standard-1. Charges based on GCE machine type pricing open_in_new will apply separately from MAGELLAN BLOCKS fees. |
| VM nodes |
Configure the number of virtual machine instances (nodes) to be used. Using up to 5 VM nodes is free of charge. From 6 nodes and up, GKE charges open_in_new will apply according to machine type (separate from MAGELLAN BLOCKS fees). |
| Containers per node |
Designate the number of BLOCKS applications (containers) per VM node that will process the data received at the entry point. You can designate between |
info_outline You can reconfigure the number of VM nodes and containers per node after creating the Data Bucket.
Click Next.
Storage settings
In this section, you configure settings for where the data will be stored.
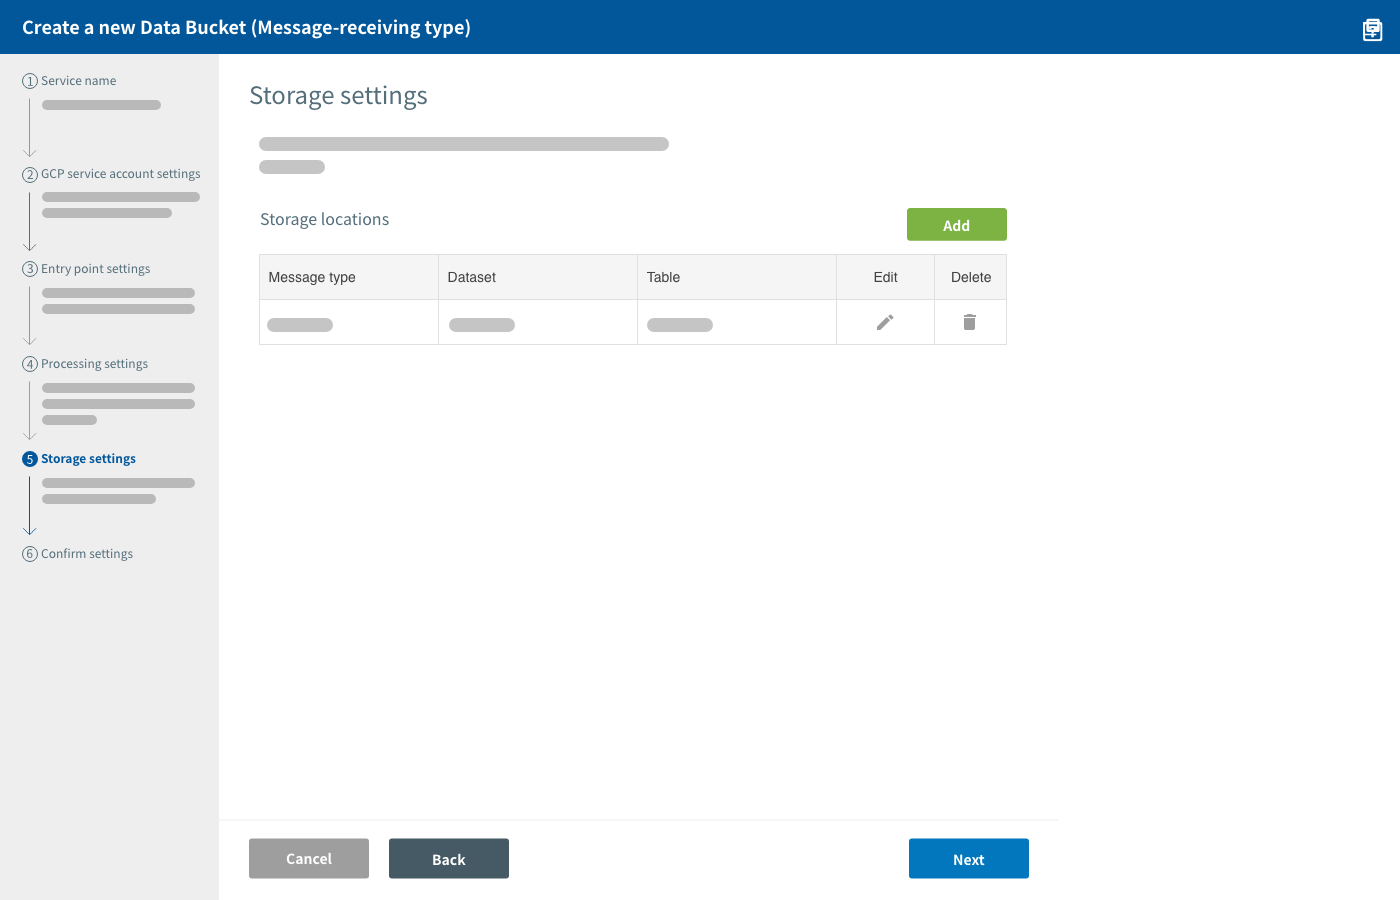
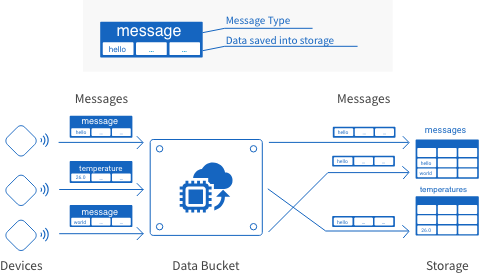
These settings configure where and how the data will be stored into the cloud. It’s possible to store data separately according to data type.
Data types are identified by message type identifiers. In addition to the type of data sent, message types also act as identifiers for the storage location.
Data sent from devices to a Data Bucket must contain these message types, since this is how the Data Bucket decides where to store the data.
In this section, you create profiles for the data's storage locations. You can add, edit, or delete profiles for storage locations by doing the following:
- Click Add to configure a new storage location.
- Click a storage location's pencil button to edit it.
- Click a storage location's trash button to delete it.
The current message-receiving Data Bucket version only supports storing data to BigQuery. As such, storage location settings are all related to BigQuery.
Configure the following information for each BigQuery storage location:
| Item | Explanation |
|---|---|
| Message type |
Designate the message type of the data to be saved. Data identified by this message type will be saved to the BigQuery table configured in the settings that follow. |
| Dataset | Designate the ID of the BigQuery dataset where this data will be saved. |
| Table | Designate the name of the BigQuery table where this data will be saved. |
| Schema |
Designate the table’s schema. |
| Table division |
Designate if the table will be divided by day, month, or not. If using table division, you must also configure the Times for table division (field) setting. |
- Regarding table division:
-
You can either set Times for table division (field) to Use time that data was sent to the Data Bucket, or select a field that contains TIMESTAMP type data. When selecting Use time that data was sent to the Data Bucket, the table will be divided according to the time the Data Bucket received the data.
If you choose to divide tables by day or month, suffixes will be added to the table’s name. These suffixes are formatted as follows:
- Divide by day: _%Y%m%d
- Divide by month: _%Y%m01
%Y, %m, and %d are replaced with the times stored in the Times for table division (field). The format is year (4 digits), month (2 digits), and day (2 digits). As an example, a table named sample set to Divide by day would be divided into tables named like sample_20160905, and sample_20160906.
Click Next.
Confirm settings
You can review and confirm your settings on this screen.
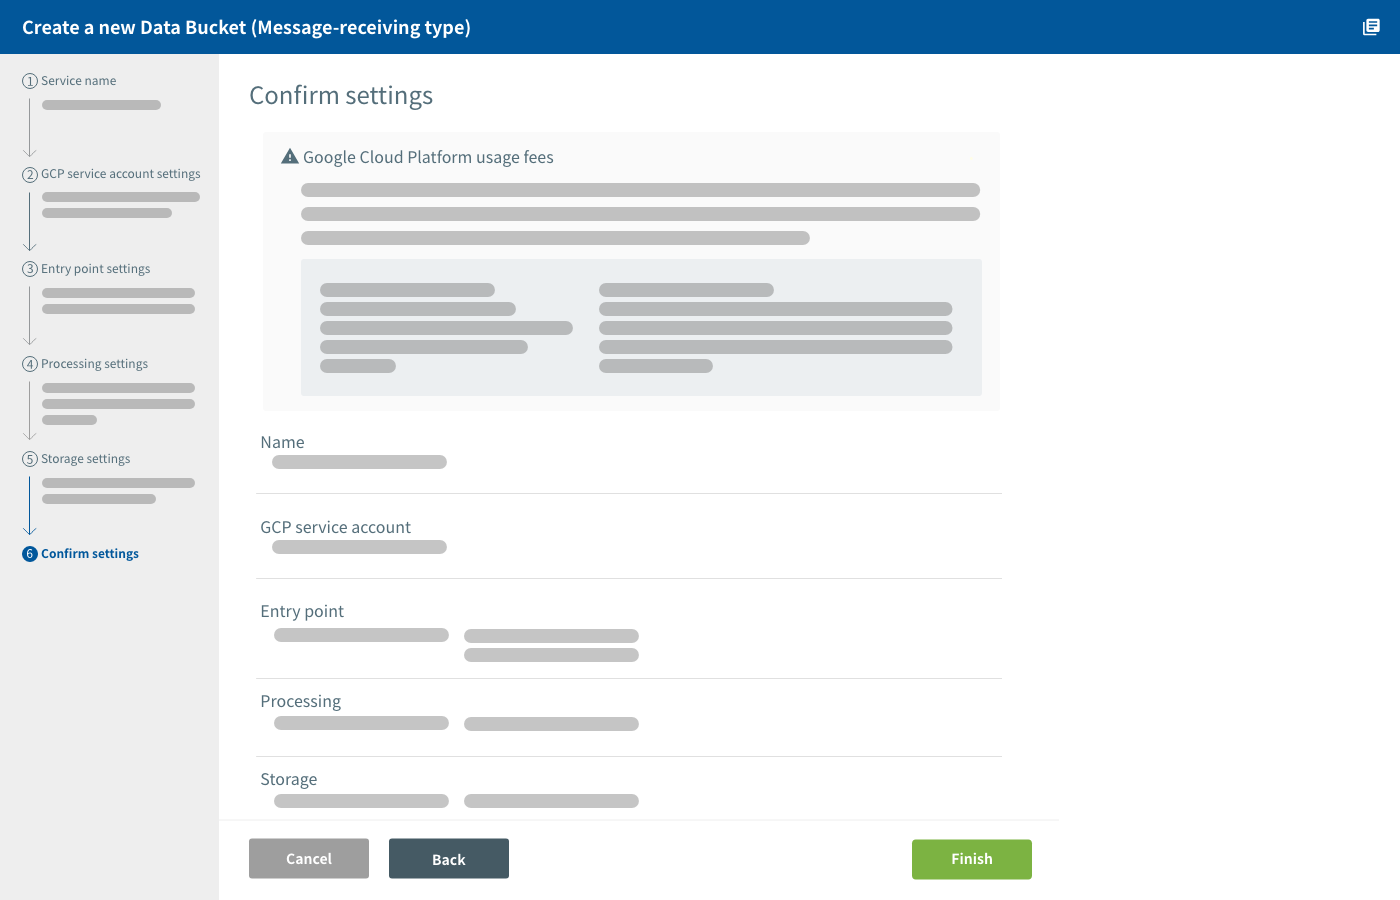
If you find any mistakes, click the Back to return to the relevant settings screen. Once you have fixed everything, return to the Confirm settings screen and click Finish.
It will take a bit of time for the Data Bucket to be created. You’ll be taken to the Data Bucket’s details screen once it finishes.
Sending data to the Data Bucket
This section explains the process of sending data from devices to a Data Bucket.
The following three pieces of information are required when sending data:
- The entry point URL
- An API token
- A message type
You can be find this information on the Data Bucket’s details screen. Open this by clicking on an Data Bucket’s name from the Data Bucket list.
To send data from devices to the Data Bucket, use the HTTP POST method to access the entry point URL.
The data should be in JSON format and include the API token and message type information.
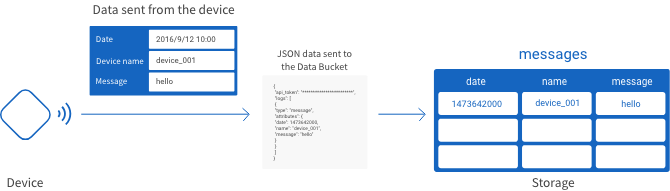
The following is an example of JSON format data that is ready to send to a Data Bucket:
{
  "api_token": "************************",
  "logs": [
    {
      "type": "message",
      "attributes": {
        "date": 1473642000,
        "name": "device_001",
        "message": "hello"
      }
    }
  ]
}
Each member (name/value pair separated by a colon) is explained below:
| Name | Explanation of value |
|---|---|
| "api_token" | Designate the API token with a string. |
| "logs" |
Designate the data as an array of objects.
|
| "type" | Designate the message type. The data's storage location (a BigQuery table) is determined by this message type. |
| "attributes" |
Designate the data to be stored as objects. For BigQuery storage, names refer to the field names of the table where data will be stored, and values refer to the actual data to be stored into those fields. For fields dealing with date/time, data must be designated using Unix timestamp formatting. In this example, the name is “date” and the value is “1473642000”. |
The following example puts together two types of data into JSON format ready to be sent to a Data Bucket.
{
  "api_token": "************************",
  "logs": [
    {
      "type": "message",
      "attributes": {
        "date": 1473642000,
        "name": "device_001",
        "message": "hello"
      }
    },
    {
      "type": "temperature",
      "attributes": {
        "date": 1473642000,
        "name": "device_fukuoka_001",
        "temperature": 24.5
      }
    }
  ]
}
GCP service charges
Data Buckets create an environment within your GCP project that makes use of several GCP services.
As such, GCP service charges will apply separately from MAGELLAN BLOCKS fees. These charges vary depending on the service. For details, refer to the pricing page for each service used by Data Buckets.
How to use Data Buckets
In this section, we’ll demonstrate how to create a Data Bucket that collects two types of data from IoT devices.

Demonstration Data Bucket specifications
Our Data Bucket will collect the following two types of data:
| Data type | Details (content: format) |
|---|---|
| Message |
|
| Temperature |
|
The storage settings for this data will be as follows:
| Item | Value | ||||||||||||
|---|---|---|---|---|---|---|---|---|---|---|---|---|---|
| Message type | message | ||||||||||||
| Dataset | sample | ||||||||||||
| Table | messages | ||||||||||||
| Schema |
|
||||||||||||
| Table division | Division by day, using the "date" field |
| Item | Value | ||||||||||||
|---|---|---|---|---|---|---|---|---|---|---|---|---|---|
| Message type | temperature | ||||||||||||
| Dataset | sample | ||||||||||||
| Table | temperatures | ||||||||||||
| Schema |
|
||||||||||||
| Table division | Division by day, using the "date" field |
Making the Data Bucket
Using this information as a base, we will create a Data Bucket with the following settings:
| Screen | Item | Contents |
|---|---|---|
| Create a new Data Bucket | Type | Select Message-receiving type. |
| Name | Enter a name for the Data Bucket. | |
| GCP service account settings | Service account | Select your GCP service account. |
| Entry point settings | Optional settings | Leave as default. |
| Processing settings | Optional settings | Leave as default. |
| Storage settings | Storage location | Add the information from Message data storage and Temperature data storage found in Demonstration Data Bucket specifications. |
Testing it out
Now, we’ll try sending data to our Data Bucket following the information outlined in Sending data to Data Buckets. However, instead of using devices, we’ll use a PC to send the data. We’ll use Unix curl commands to send data from the PC.
This time, we’ll use the following Data Bucket Connection Information and data:
| Item | Value |
|---|---|
| Entry point URL | https://magellan-iot-*****-dot-magellan-iot-sample.appspot.com |
| API token | ***** |
| Item | Name | Value |
|---|---|---|
| Message type | "type" | "message" |
| Date/time the message was sent | "date" | 1473642000 (2016/09/12 10:00) |
| Name of the device sending the message | "name" | "device_001" |
| Message | "message" | "hello" |
| Item | Name | Value |
|---|---|---|
| Message type | "type" | "temperature" |
| Date/time the temperature data was sent | "date" | 1473642600 (2016/09/12 10:10) |
| Name of the device sending the temperature data | "name" | "device_fukuoka_001" |
| Temperature | "temperature" | 24.5 |
The curl commands to send the data are as follows:
First data type:
curl --data '{"api_token":"*****","logs": [{"type": "message","attributes": {"date": 1473642000,"name": "device_001","message": "hello"}}]}' https://magellan-iot-*****-dot-magellan-iot-sample.appspot.com/
Second data type:
curl --data '{"api_token":"*****","logs": [{"type": "temperature","attributes": {"date": 1473642600,"name": "device_fukuoka_001","temperature": 24.5}}]}' https://magellan-iot-*****-dot-magellan-iot-sample.appspot.com/
Or, the two data types can be sent together in one curl command as shown below:
curl --data '{"api_token":"*****","logs": [{"type": "message","attributes": {"date": 1473642000,"name": "device_001","message": "hello"}},{"type": "temperature","attributes": {"date": 1473642600,"name": "device_fukuoka_001","temperature": 24.5}}]}' https://magellan-iot-*****-dot-magellan-iot-sample.appspot.com/
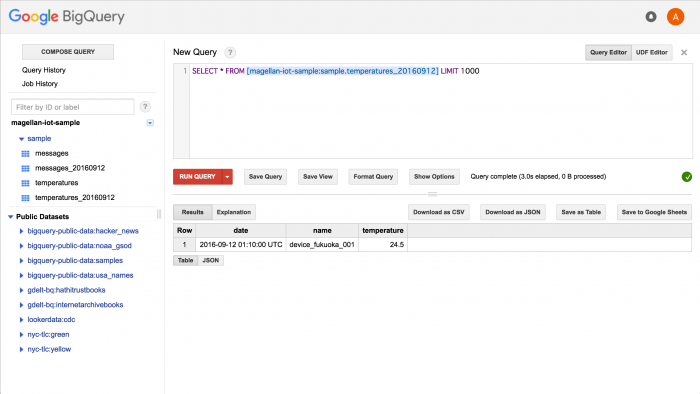
We’ll confirm the results in BigQuery.
Message data:

Temperature data: