Introduction
This tutorial explains how to use the Text Classification Model Generator in MAGELLAN BLOCKS to create a model that predicts which of three authors wrote given sentences.

error This service is currently in beta. As such, some of the features and steps described in this guide may change in the full release. We appreciate feedback from users regarding bugs or ways to improve BLOCKS.
General overview of steps
To perform text classification in MAGELLAN BLOCKS, we will use a Model Generator and a Flow Designer.
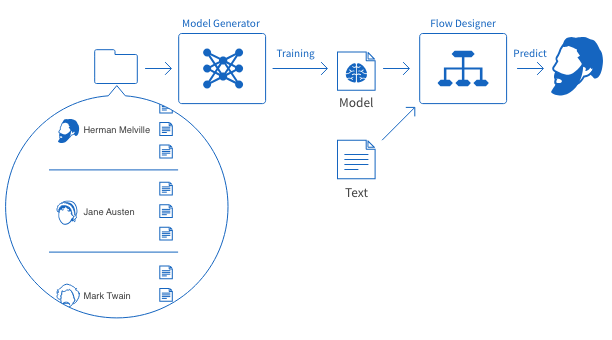
First, we’ll train a model using a Model Generator. For this training, we upload example passages from each author into the Model Generator. Then, it “learns” the identifying features within each author’s text. We refer to a successful training as a model or trained model.
Next, we’ll use a Flow Designer to predict which author wrote sentences that weren’t used in the training data.
info_outline The training and prediction data must be prepared in advance.
Trying out text classification
Before starting
We recommend using Google Chrome for this tutorial. You can also use Firefox, but one feature (explained in more detail later in the tutorial) used is only available in Google Chrome.
You’ll need data for training the text classification model, as well as data for making predictions. As mentioned earlier, we will use a Model Generator in BLOCKS to train a text classification model, and we’ll need text data for that training. Then, we will need different text data that wasn’t used during the training to make predictions and test our model. We’ve prepared data that you can use to try out this tutorial.
| Data | Explanation |
|---|---|
| cloud_download Sample Data |
A set of text files to use for text classification machine learning. It contains separate folders with files to be used as training data and prediction data. |
-
Download the sample data
Click the link above to download the sample data. The data folders are contained in a ZIP file.
-
Extract the files
Extract the data from the ZIP file. The extracted data should be organized as shown in the image below:

The training data text files are organized into separate folders by author. These folder names (the author names) will be used as the classification labels by the Model Generator. The text files must have the .txt extension.
Since this tutorial will create a model that classifies texts by Herman Melville, Jane Austin, and Mark Twain, text files for examples of their writing are placed into folders named as follows:
- herman_melville
- jane_austin
- mark_twain
-
Upload the data to Google Cloud Storage (GCS)
During the training, the Model Generator will read the training data from GCS. We’ll use the GCS Explorer tool in BLOCKS to upload the extracted folder (text_classification_sample) to GCS. Do the following to upload the folder:
Sign in to BLOCKS.
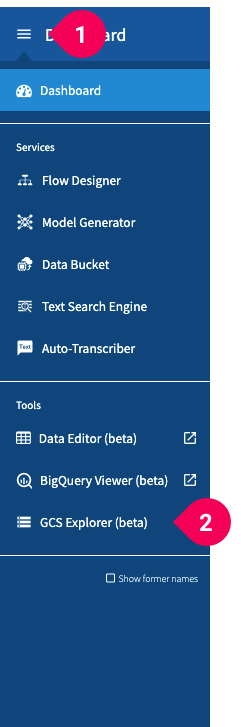
- Click the menu (menu) in the global navigation bar.
- Click GCS Explorer.
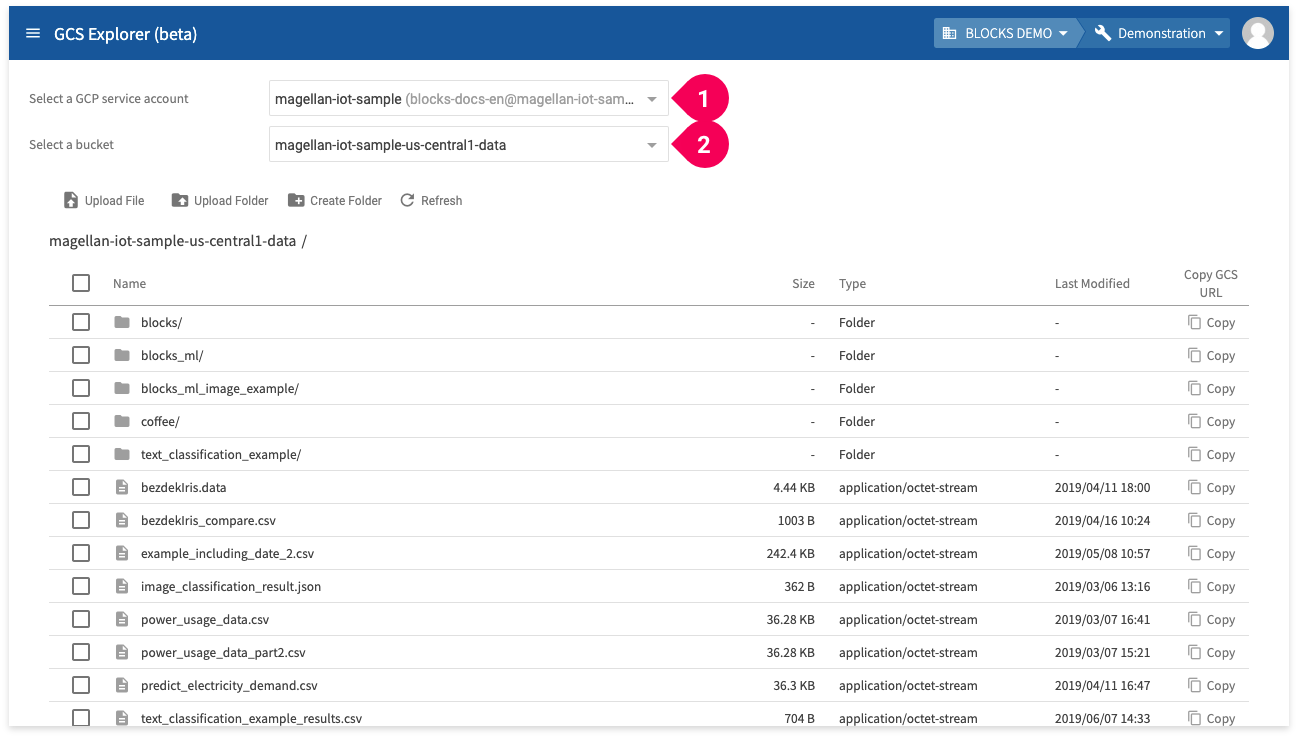
- Select a GCP service account
- Select the bucket to upload the data into. We are using a bucket that ends with -data.
info_outline Users on the Self-Service Plan (including the free trial) users, can select to automatically create default buckets including a -data bucket when creating a BLOCKS project.
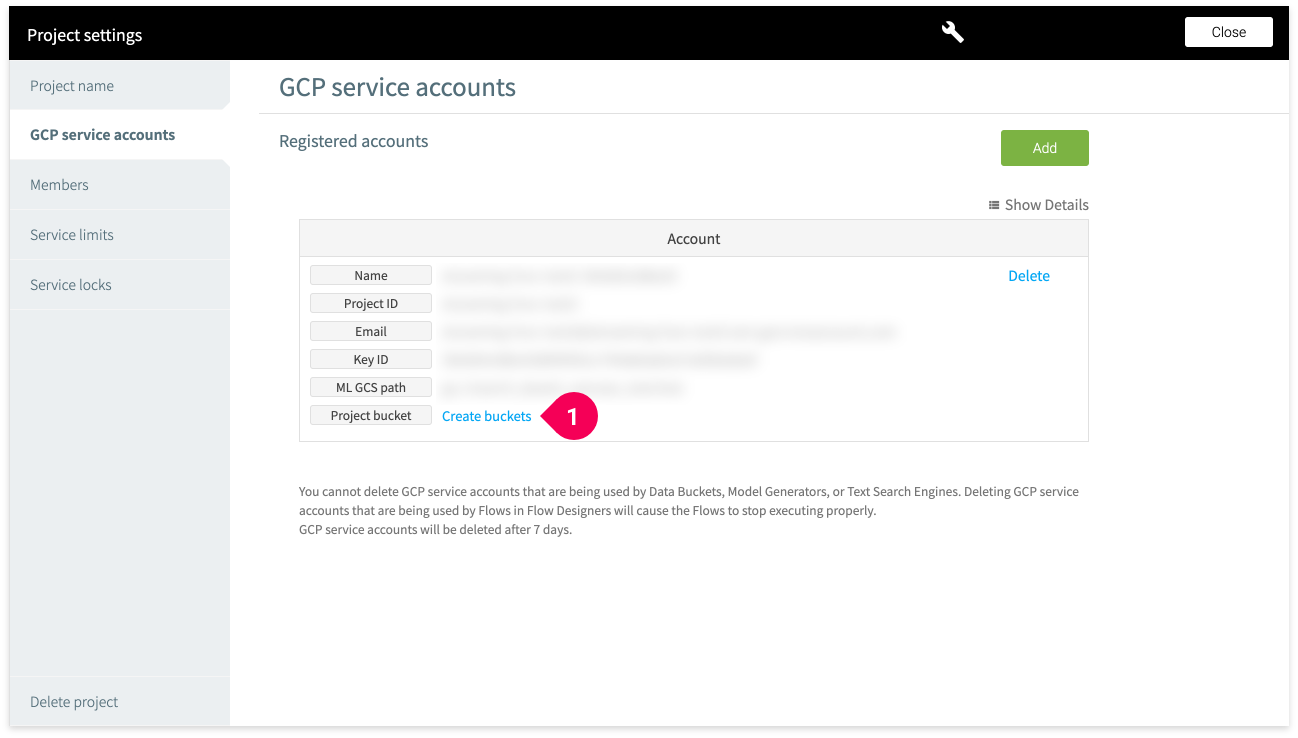
If you do not have any buckets, you can create one from the GCP service accounts section of the project settings menu.
You can select another bucket if you have already created one. However, its Storage Class must be Regional and its Location must be us-central1.
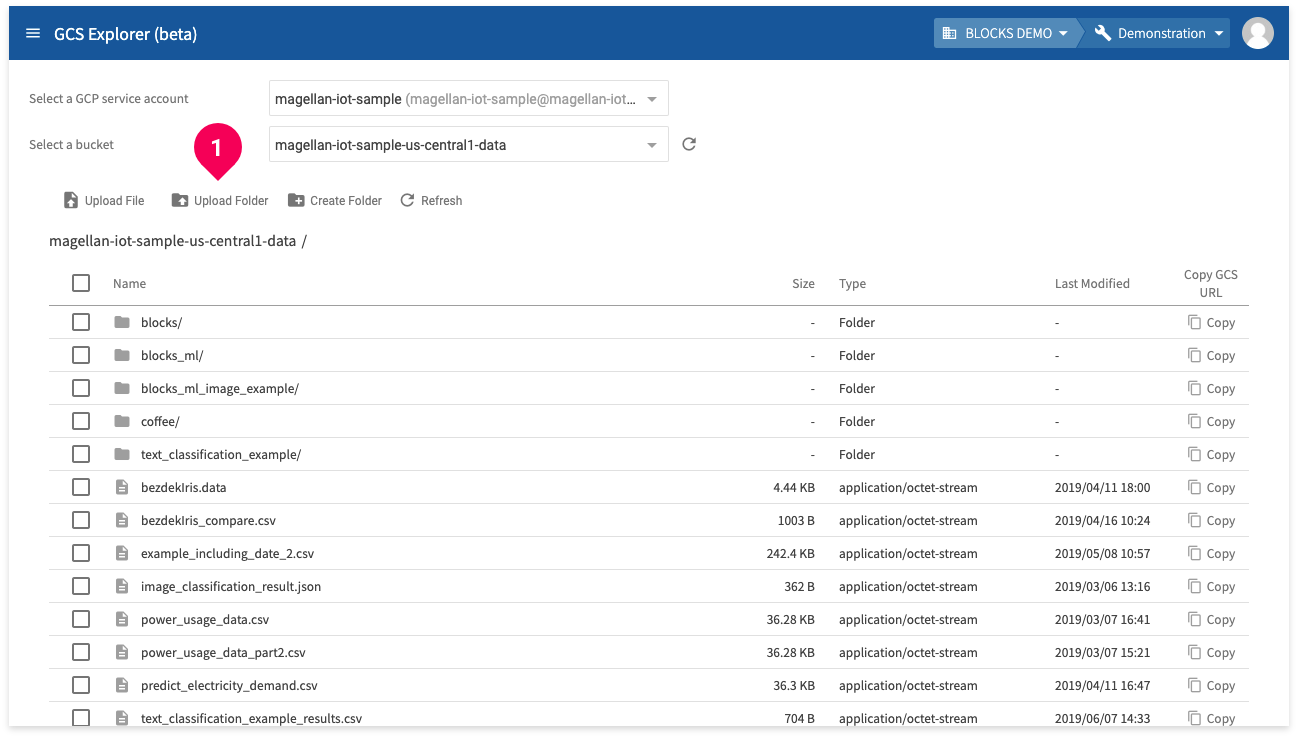
- Click Upload Folder.
info_outline The upload folder function of the GCS Explorer is not available when using Firefox. If you are using Firefox, you can use the create folder function of the GCS Explorer to create the same folders as the downloaded data in GCS, then upload the text files into those folders. For more information on uploading files in the GCS Explorer, refer to Uploading files to GCS.
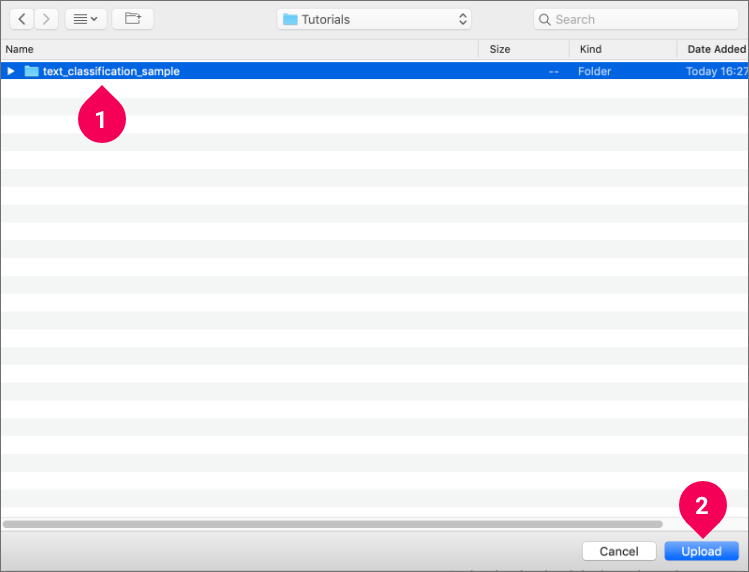
- Select the text_classification_sample folder you extracted.
- Click Upload.
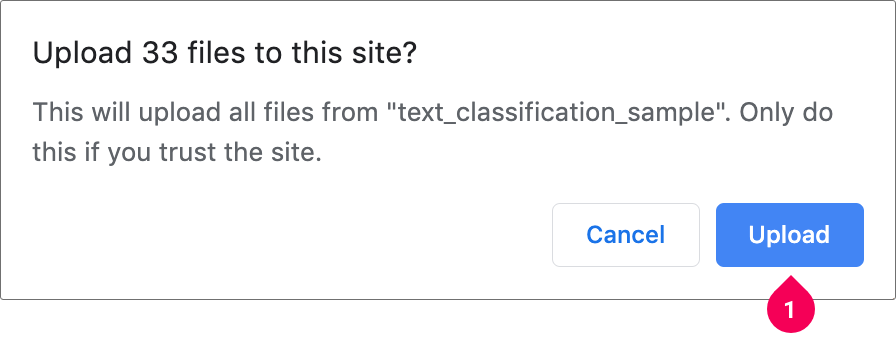
- Click Upload.
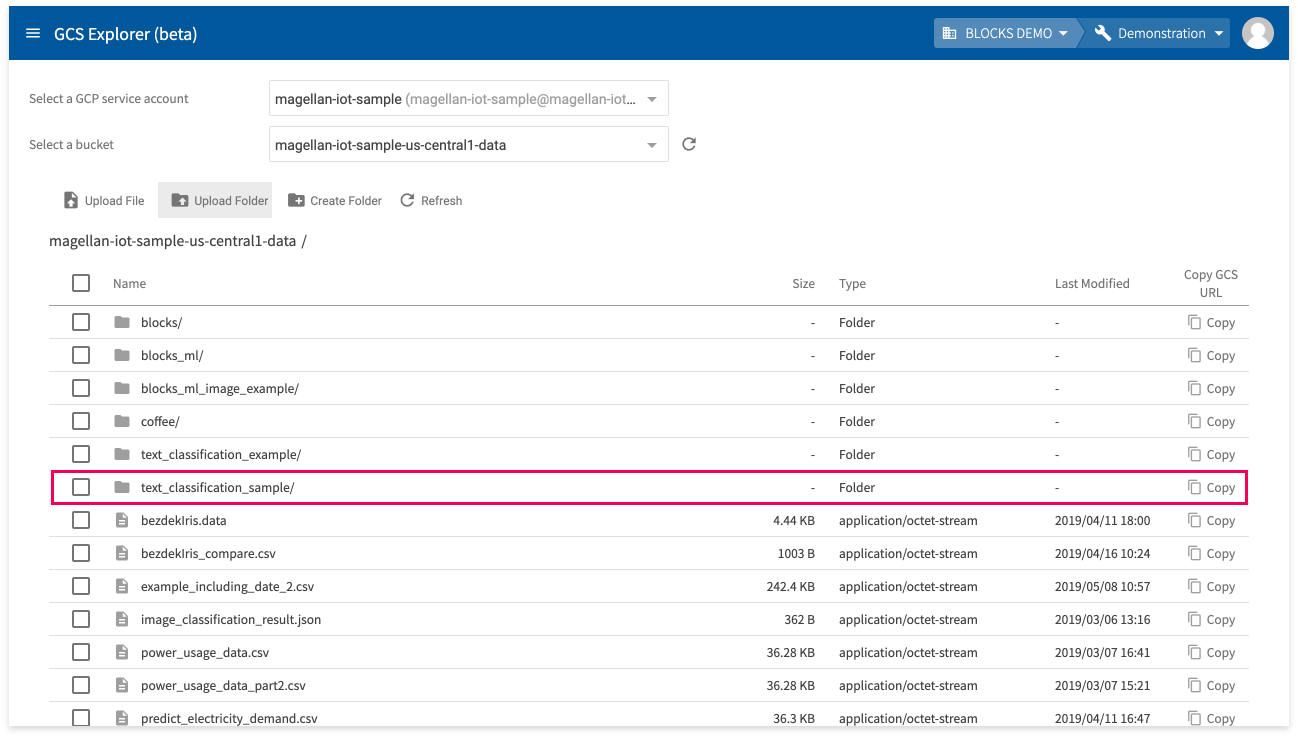
It will take a bit of time for the text_classification_sample folder to finish uploading.
Once finished, your training and prediction data will be ready to use.
Create a Model Generator
In order to train our text classification model, we’ll need to create a Model Generator designed for use with our training data.
The steps for creating this Model Generator are as follows:
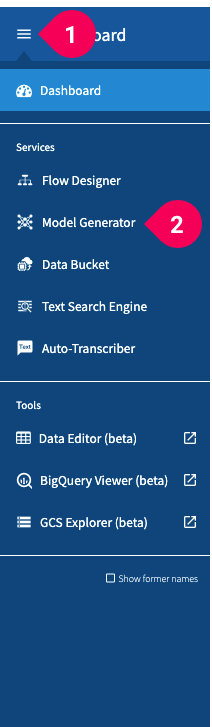
- Click the menu icon (menu) in the global navigation bar.
- Click Model Generator.
A screen titled What is the Model Generator? will appear if you haven’t created any Model Generators.
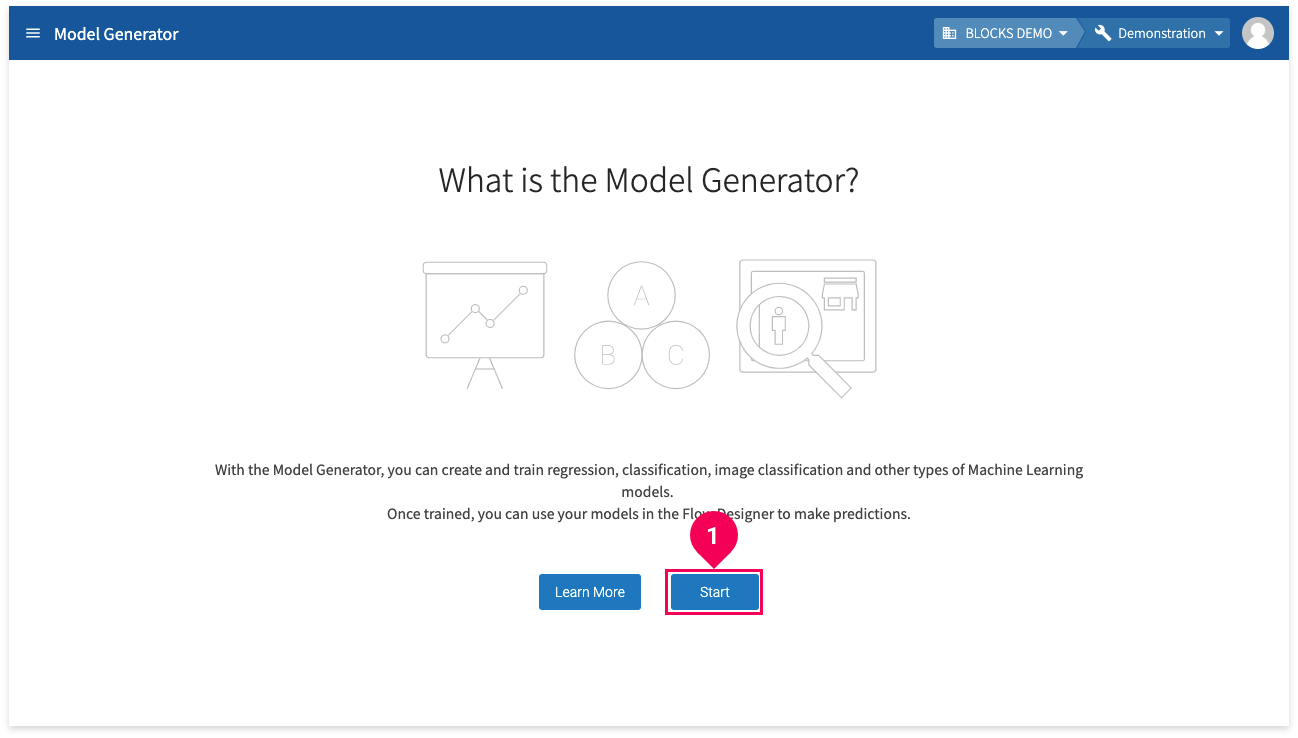
- Click Start.
info_outline A message will appear if you do not have enough licenses to create the Model Generator. If you are an admin for your organization, you will see the license purchase screen, where you can purchase an additional Model Generator license to continue. If you are not an admin, you will need to contact your organization’s admins to request that they purchase a license.
The list of Model Generators in your project will appear if any have already been created.
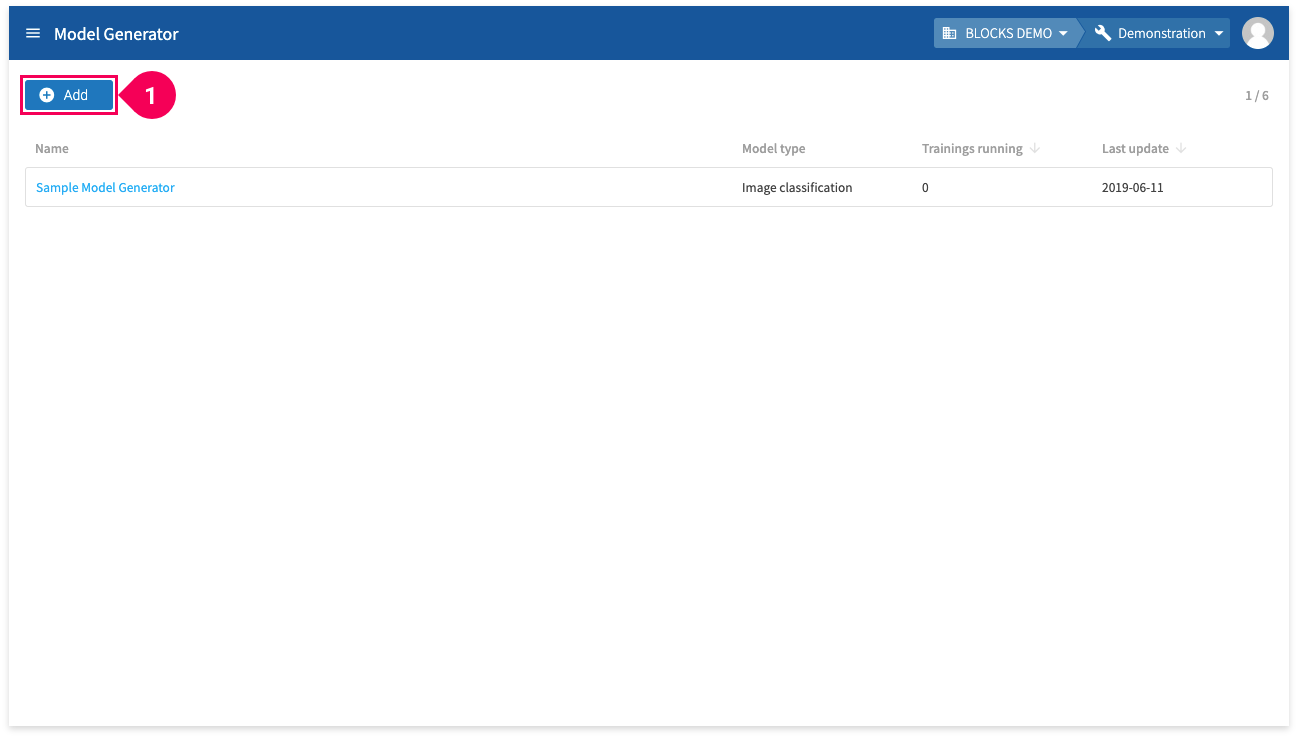
- Click Add.
info_outline A message will appear if you do not have enough licenses to create the Model Generator. If you are an admin for your organization, you will see the license purchase screen, where you can purchase an additional Model Generator license to continue. If you are not an admin, you will need to contact your organization’s admins to request that they purchase a license.
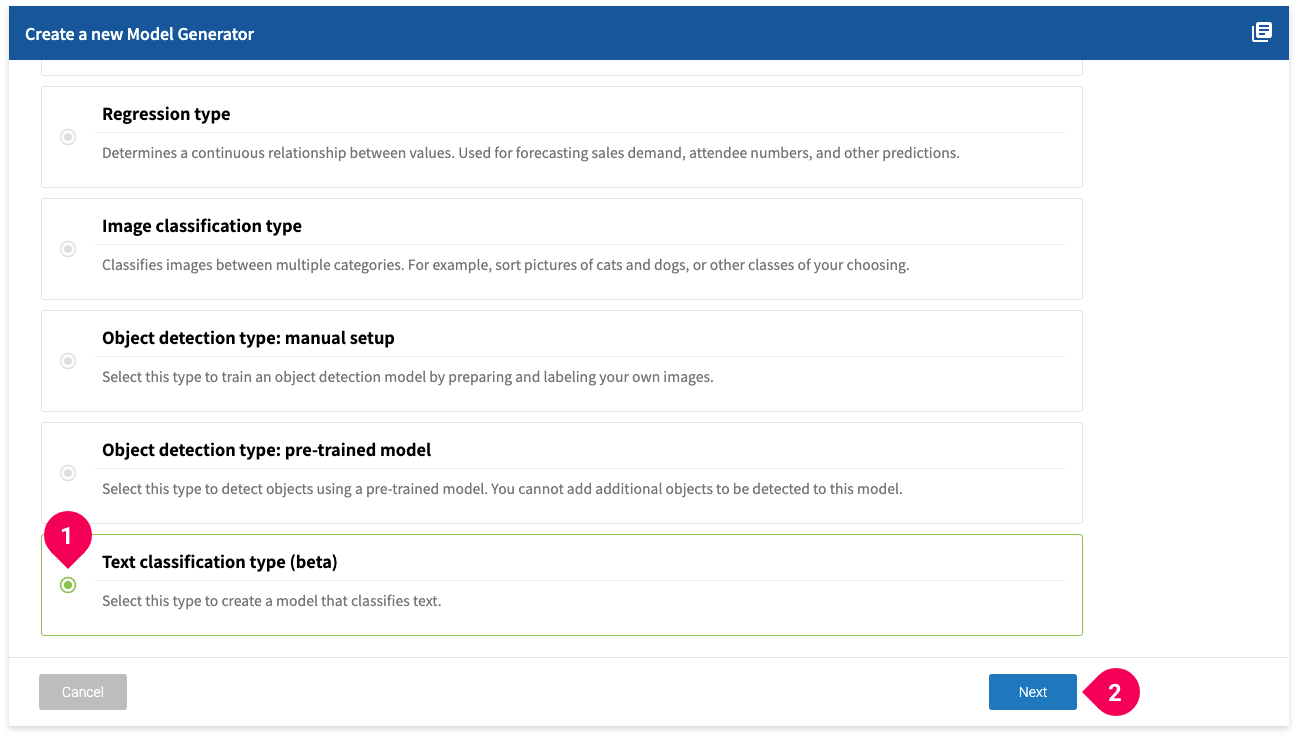
- Click Text classification model (beta).
- Click Next.
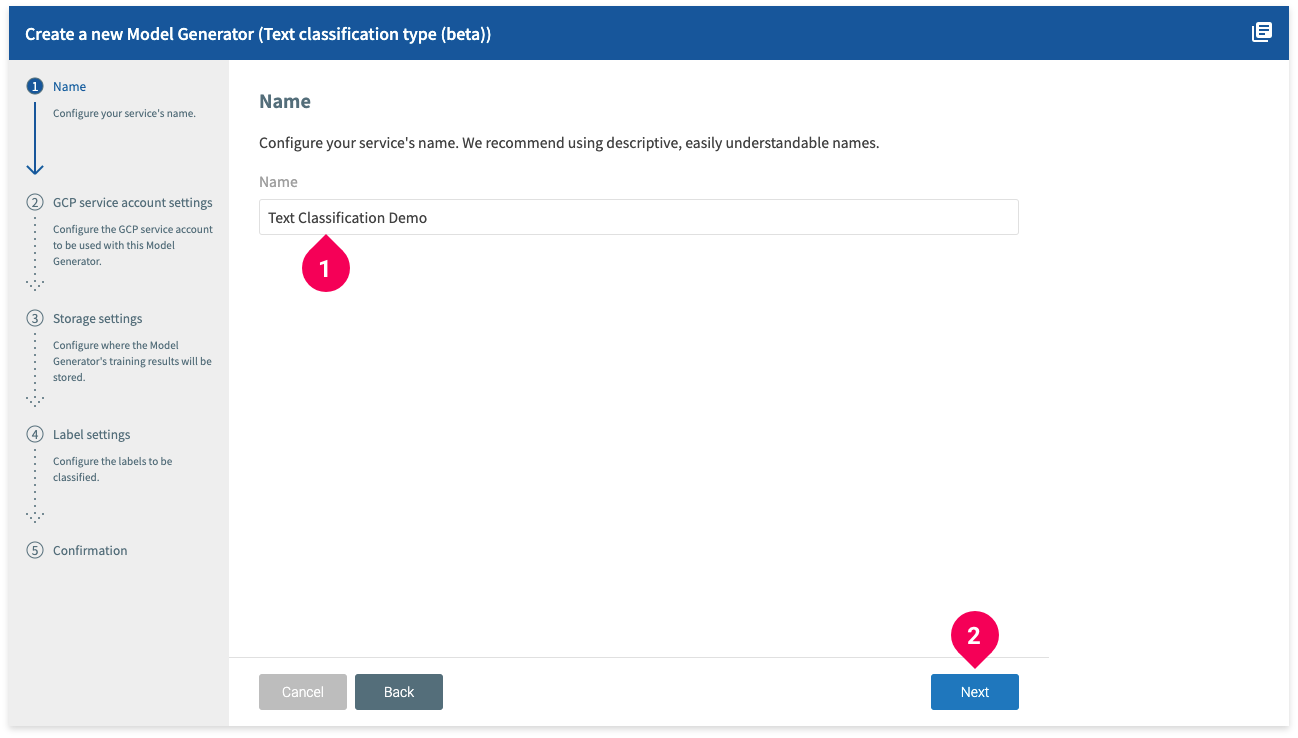
- Enter a name for the Model Generator.
- Click Next.
info_outline Free Trial and Self-Service Plan users should follow the directions on the screen to complete the following two steps:
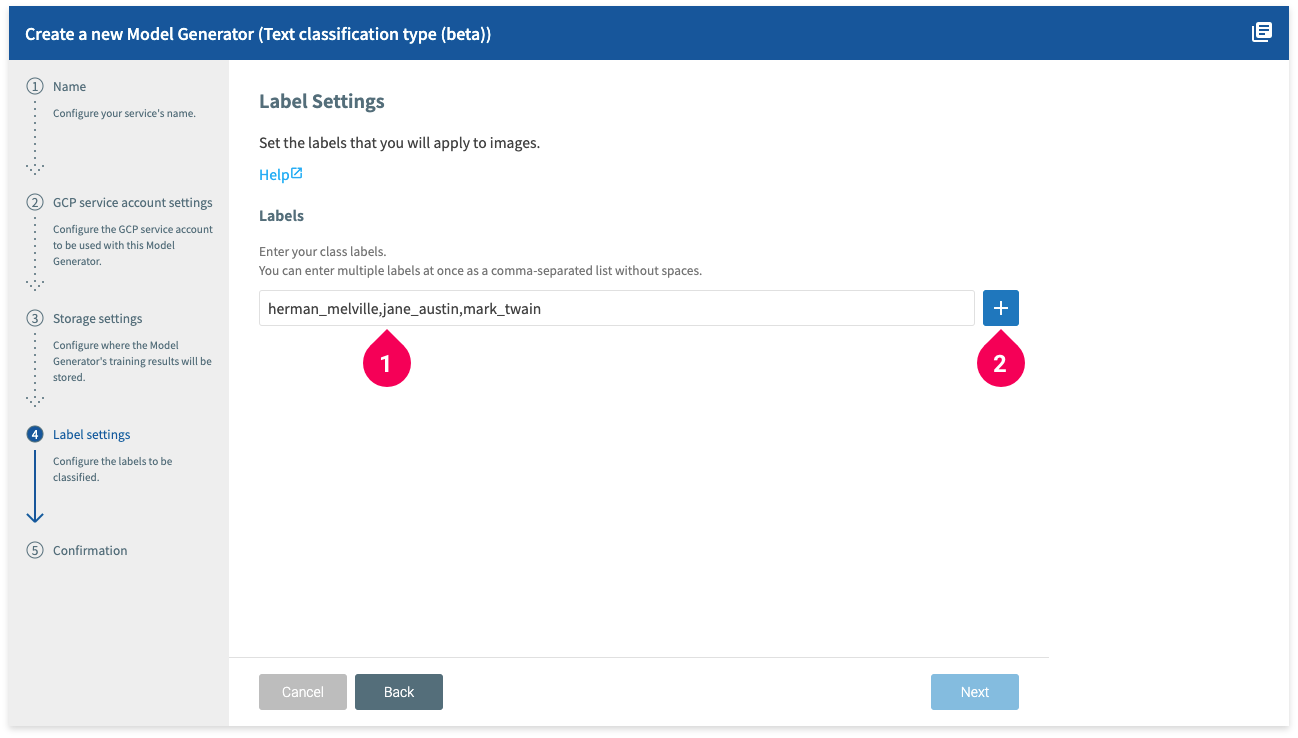
- Enter the labels for your data. For the data in this tutorial, we can enter
herman_melville,jane_austin,mark_twain. - Click Add (add_box).
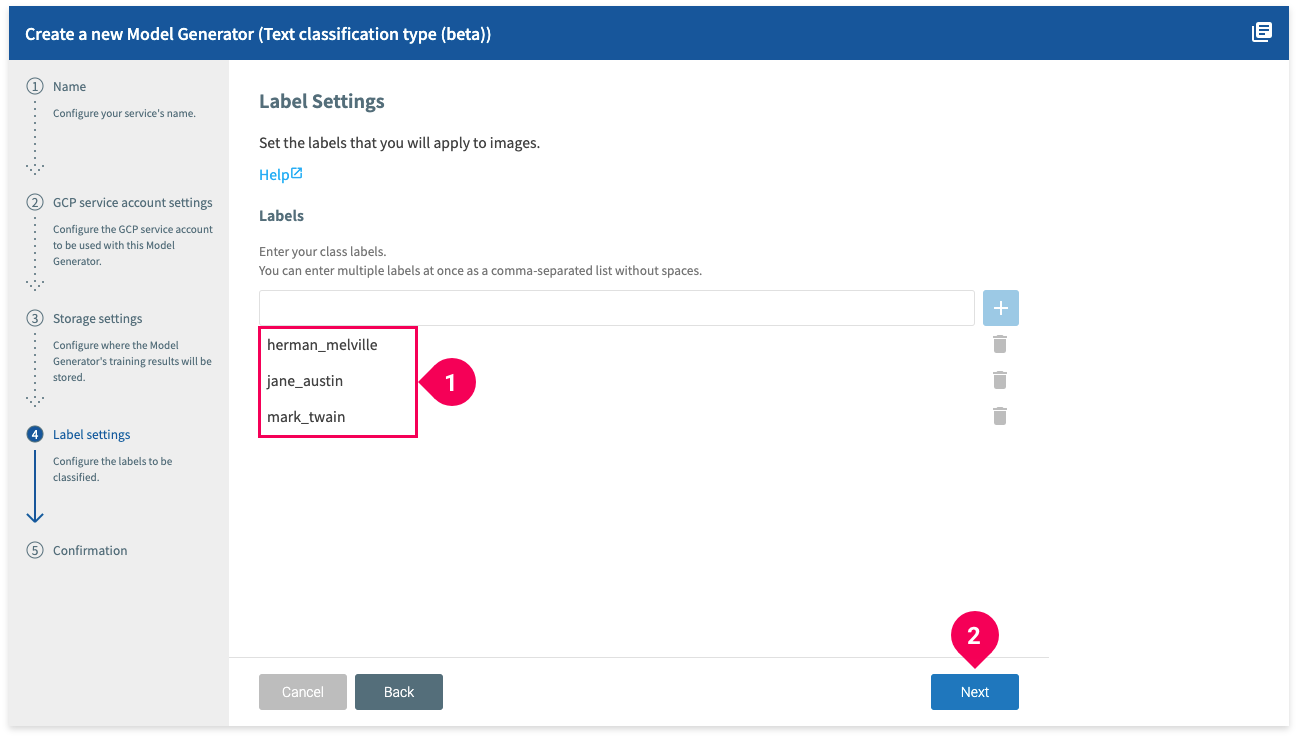
- Confirm that the labels for your data were added correctly.
- Click Next.
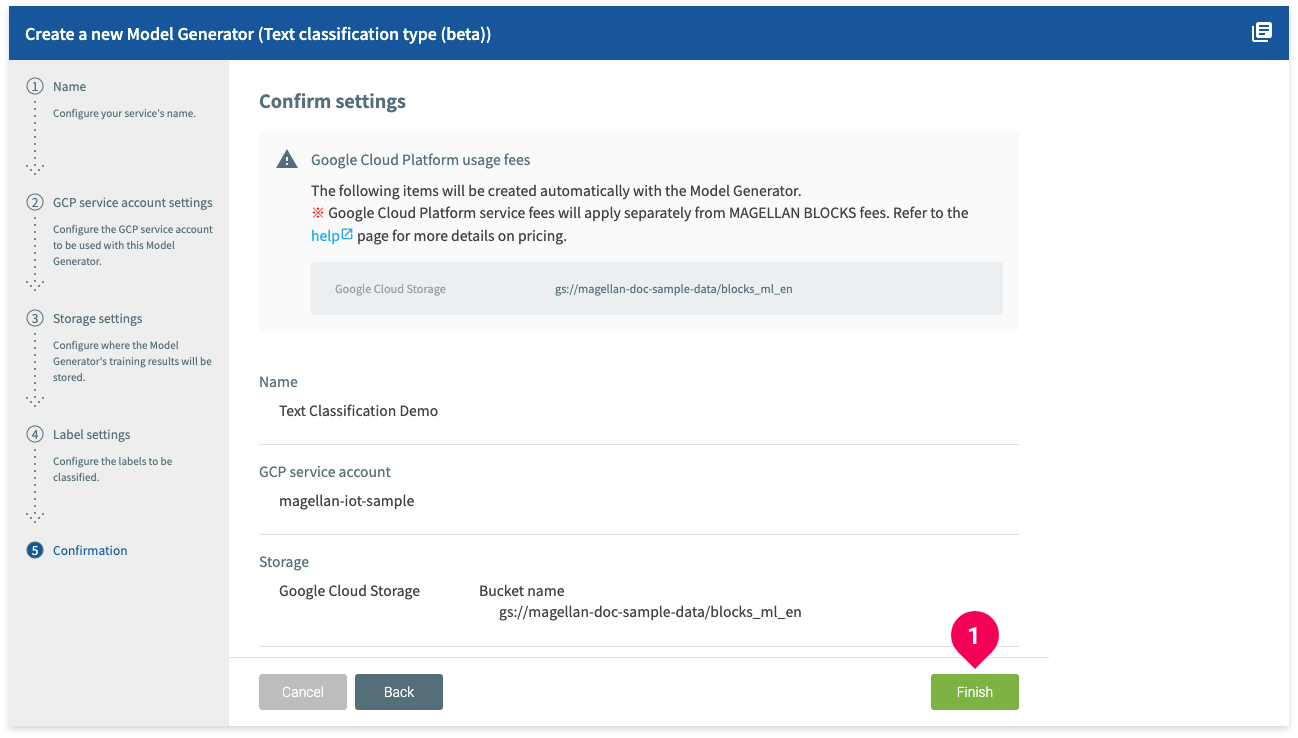
- Confirm that your settings are correct and click Finish.
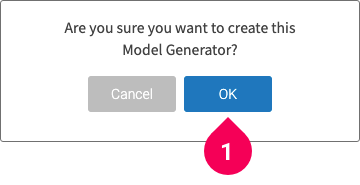
- Click OK to finish creating the Model Generator.
Training a model
Now that the Model Generator is ready, we’ll use our training data to train a model.
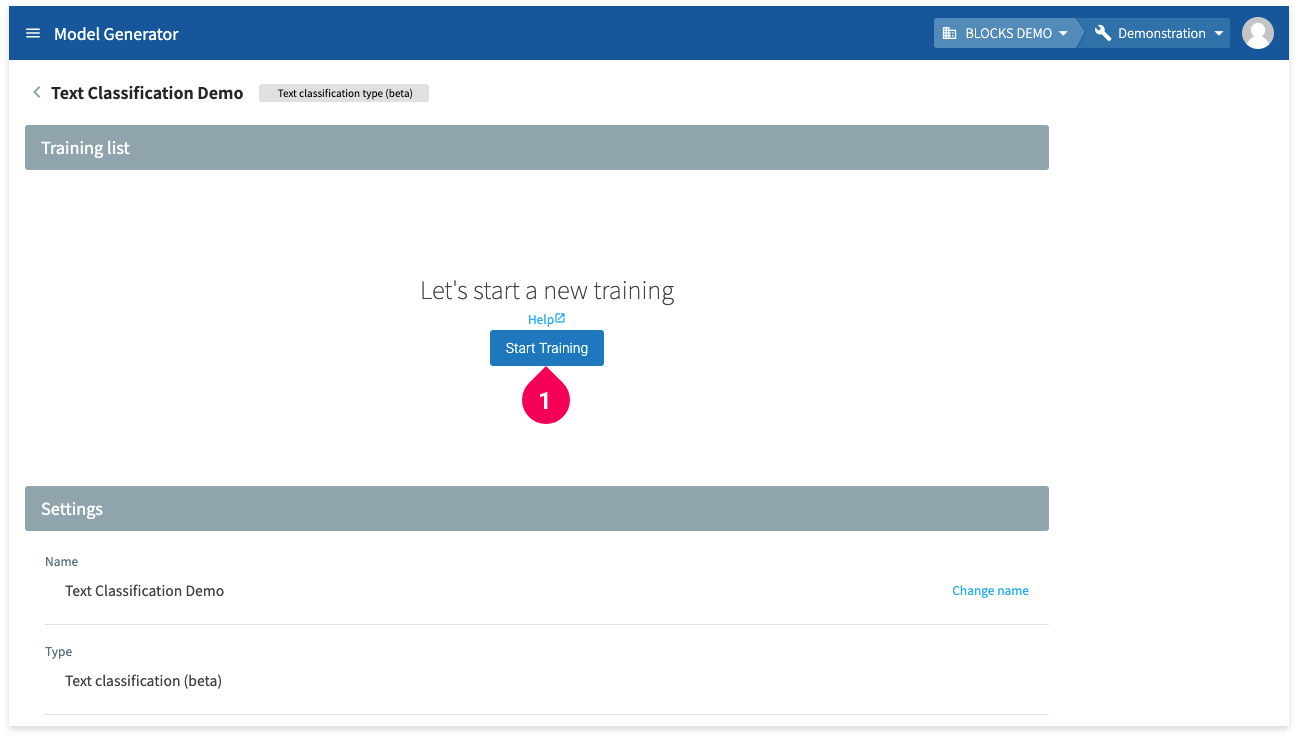
- Click Start Training.

- Enter a name for the training.
- Click the folder icon (folder).
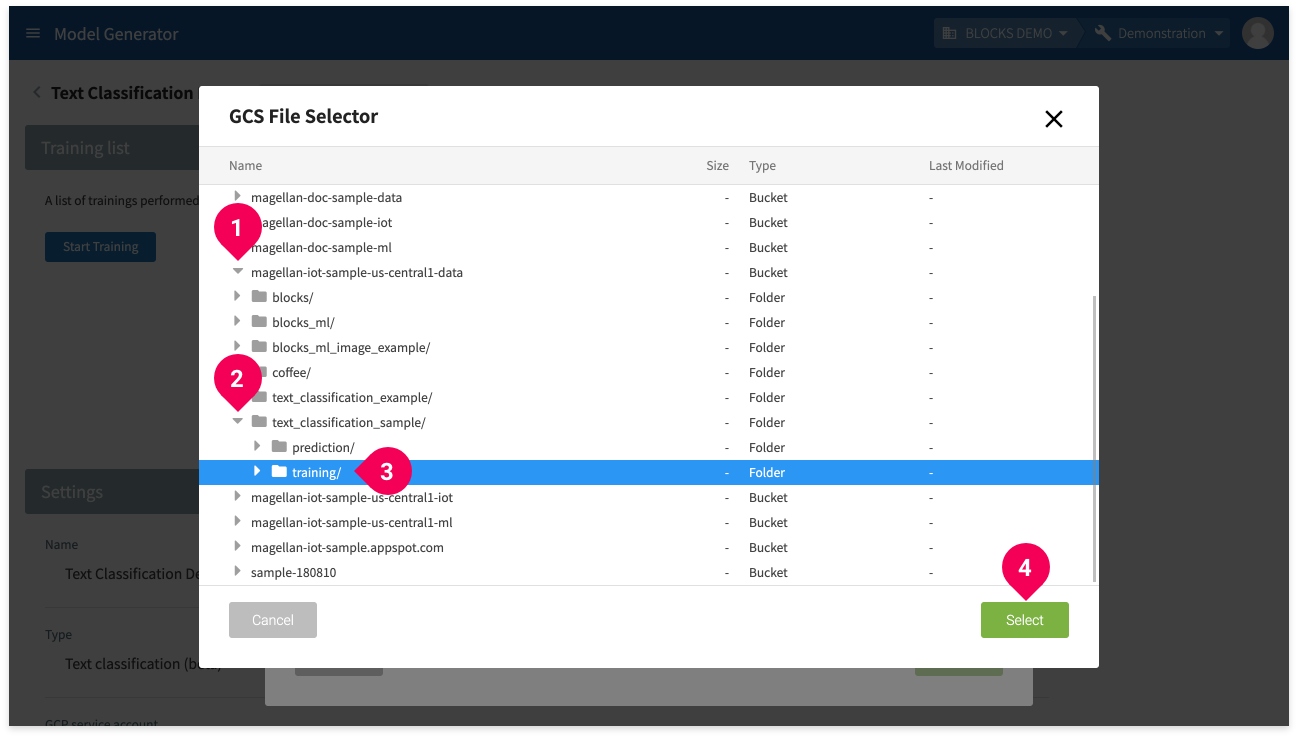
- Click the arrow icon (arrow_right) next to the bucket that contains your training data. We’ve used a bucket that ends in -data.
- Click the arrow icon (arrow_right) next to folder text_classification_sample.
- Click folder training/.
- Click Select.
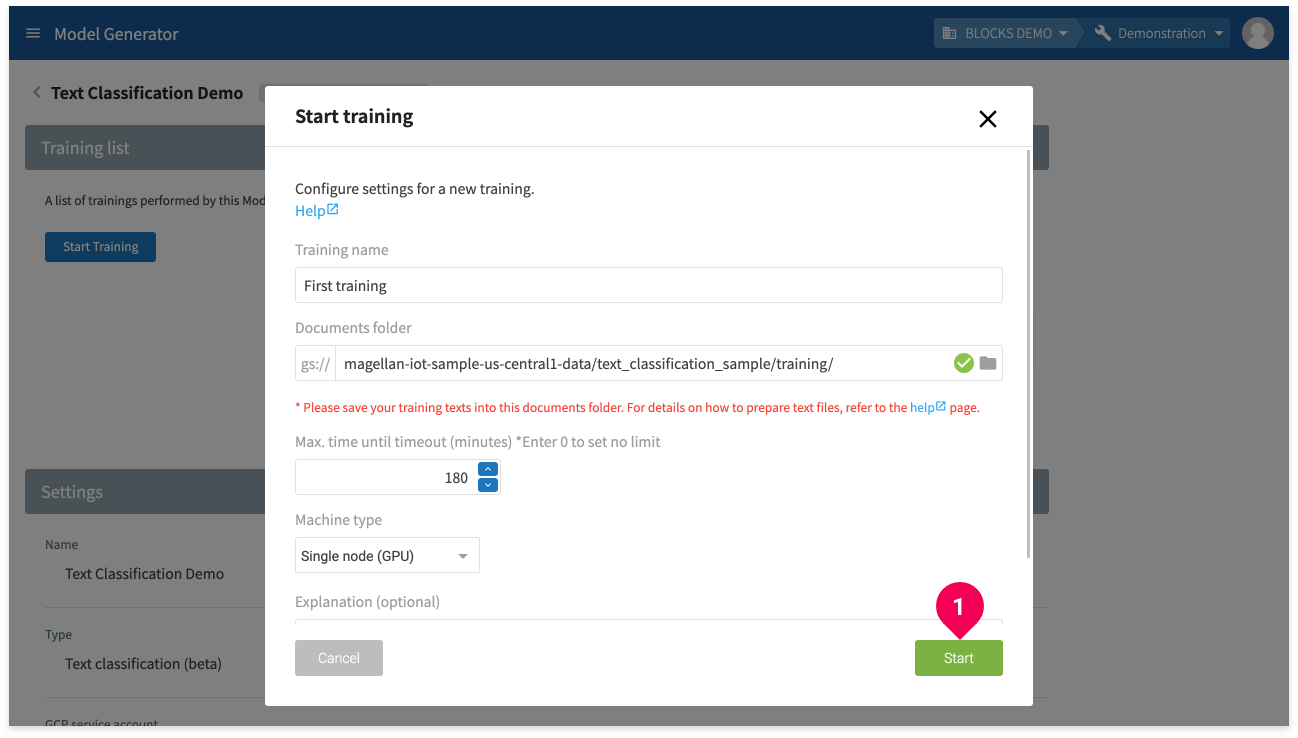
- Click Start.
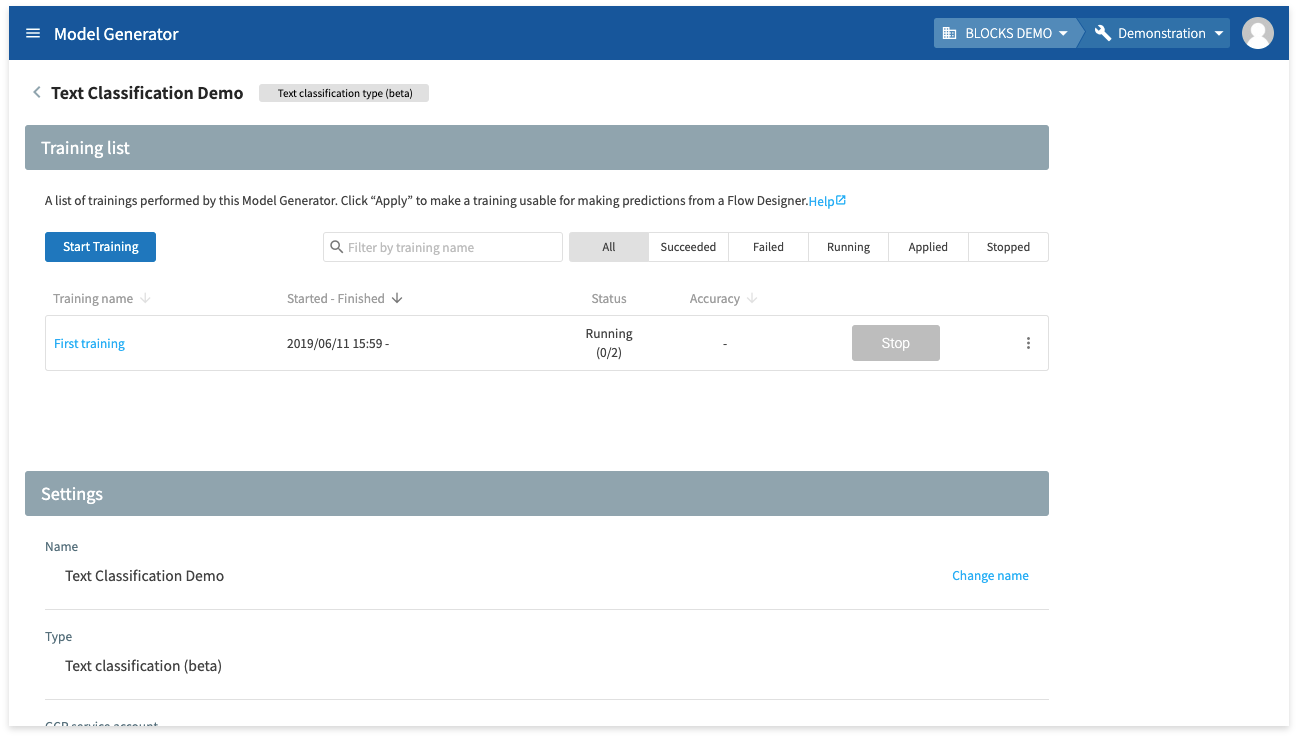
You can check on the status of a training while it is running by looking at the training list.
The training for this tutorial should take about four hours, depending on server circumstances.

The status for the training will change to Successful if it finishes successfully.
Now we need to set the model we just trained as being ready for use for predictions. To do this, we will Apply the training.

- Click the drop-down arrow (arrow_drop_down)
- Click Production.
- Click Apply.
info_outline For more details about applying to production or testing, refer to the Model Generator Help page’s Training list section.
If your training fails, please try running it again. For help determining the reason for a training’s failure, refer to In case of an error.
Creating a Flow Designer
With the trained model ready, we can now use it to make predictions in a Flow Designer. We can use the Flow Templates feature of the Flow Designer to quickly create a Flow for text classification predictions.
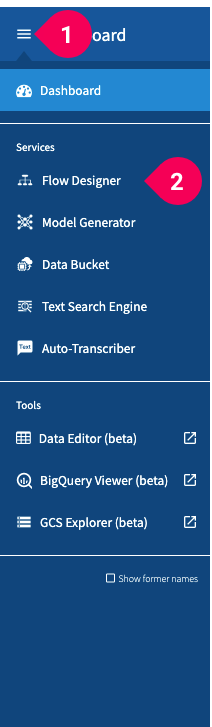
- Click the menu icon (menu) in the global navigation bar.
- Click Flow Designer.
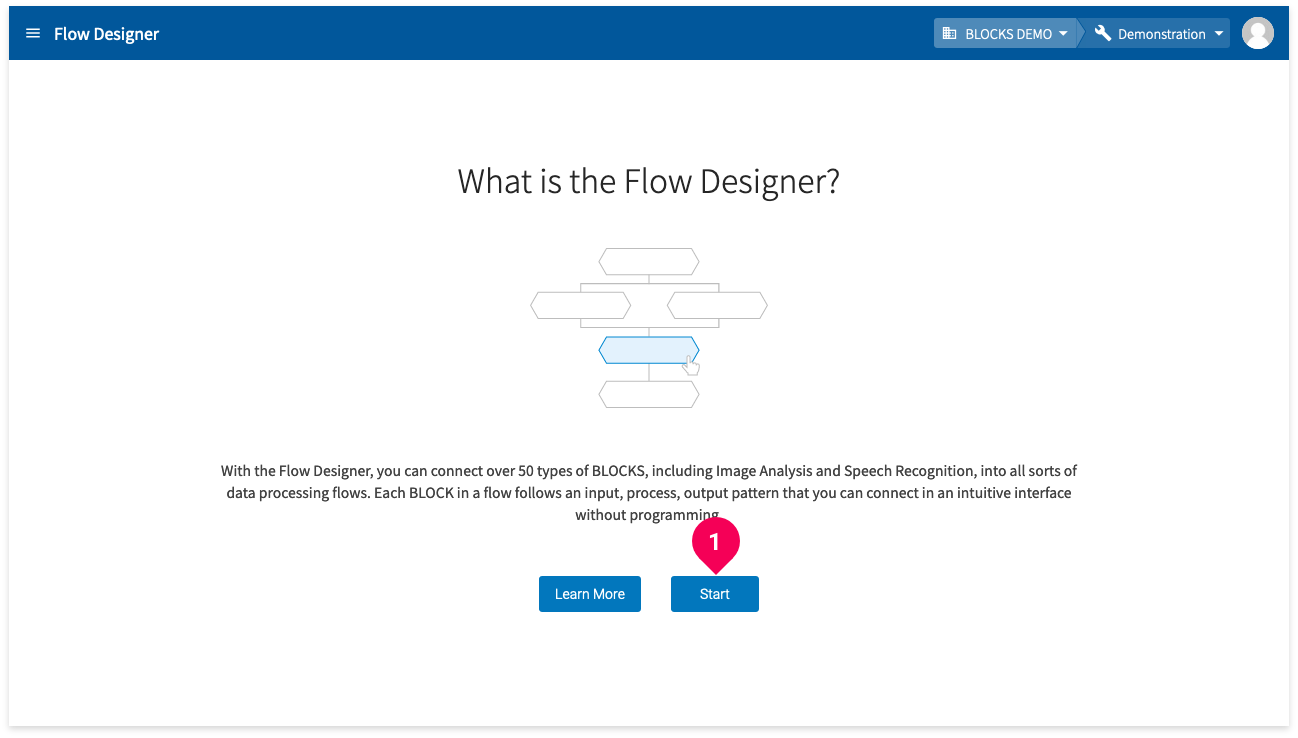
- Click Start.
info_outline If you have already created a Flow Designer in your project, you will see the Flow Designer list instead of the “What is a Flow Designer?” screen. In this case, you can click on the name of an existing Flow Designer and use it for the rest of this tutorial. If you have enough licenses and want to use a new Flow Designer, you can click Add in the upper-left corner of the Flow Designer list.
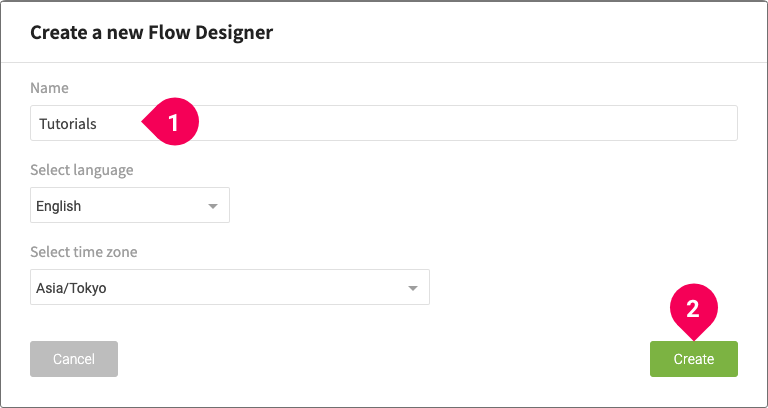
- Enter a name for the Flow Designer.
- Configure the language (for log messages) and time zone settings as necessary.
- Click Create.
Creating a Flow for making predictions
With the Flow Designer ready, we’ll use the Flow Templates menu to create a Flow for making predictions with the model we trained.
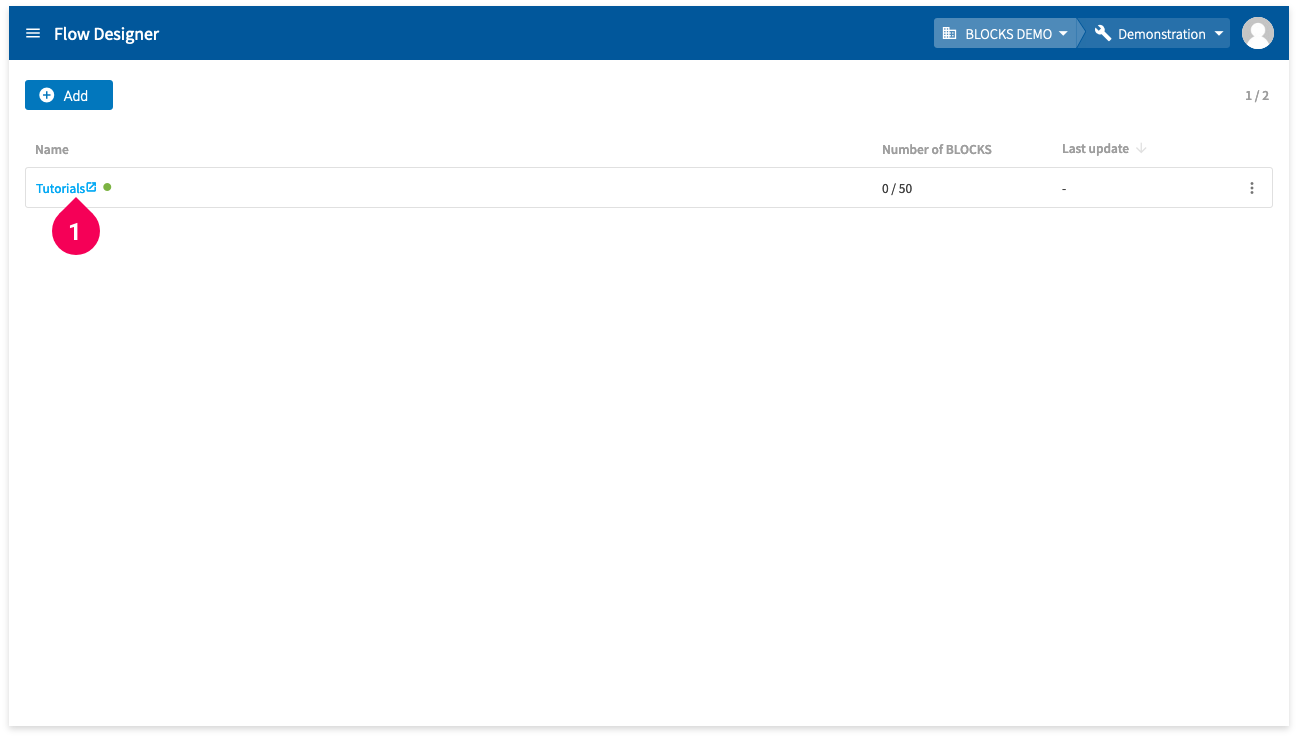
- Click the name of the Flow Designer you will use.
Your Flow Designer will open in a new tab.
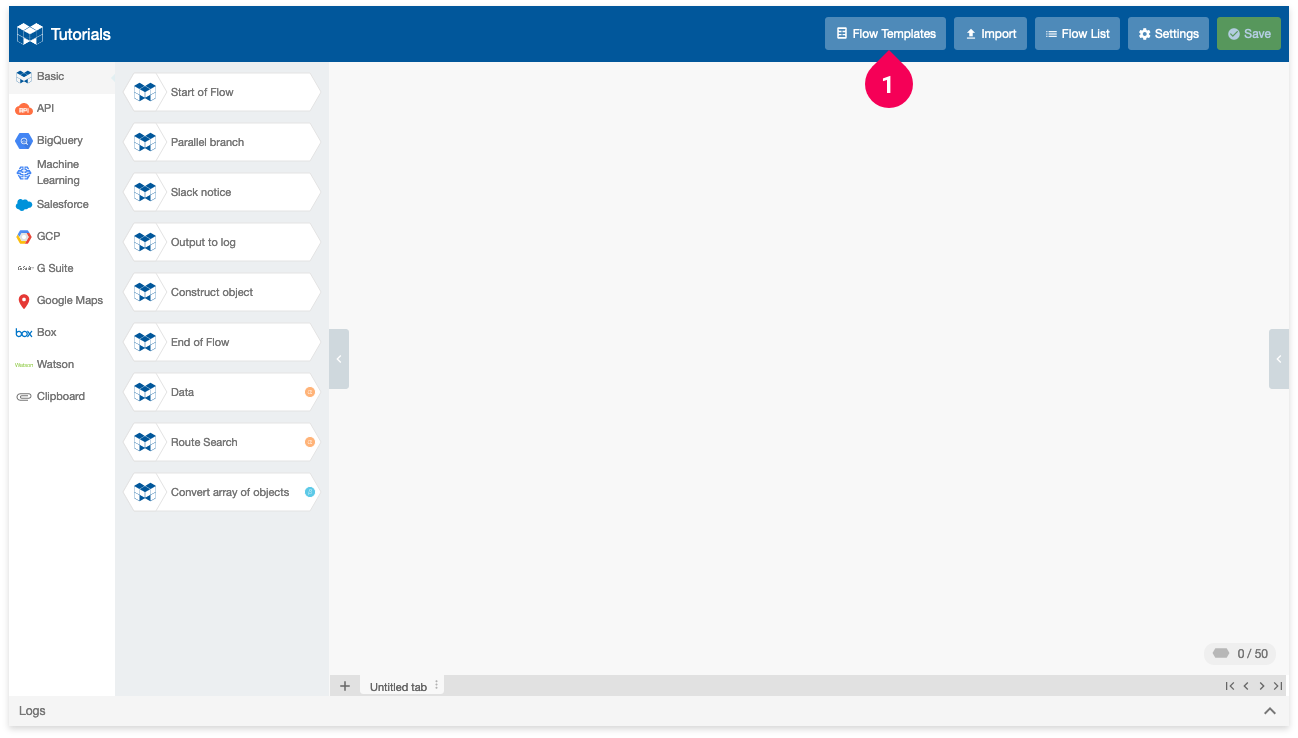
- Click Flow Templates.
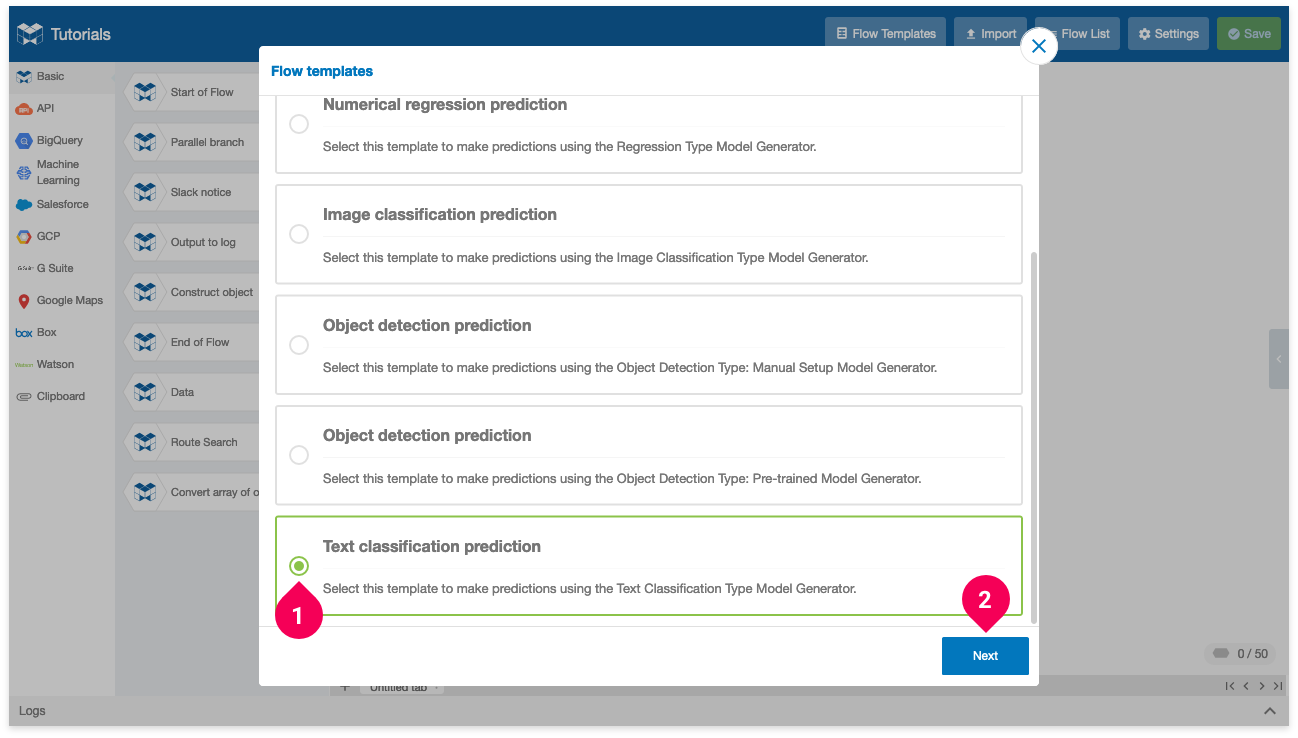
- Click Text classification prediction.
- Click Next.
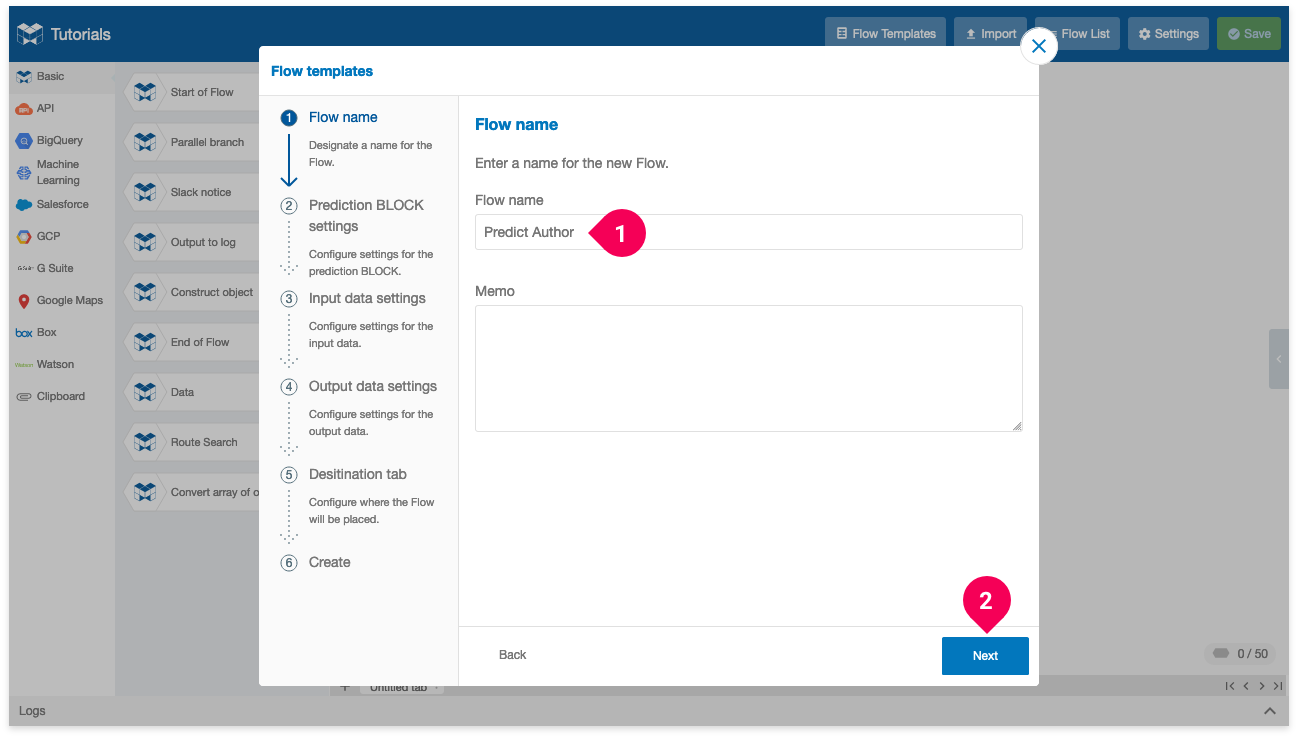
- Enter a name for the Flow.
- Click Next.
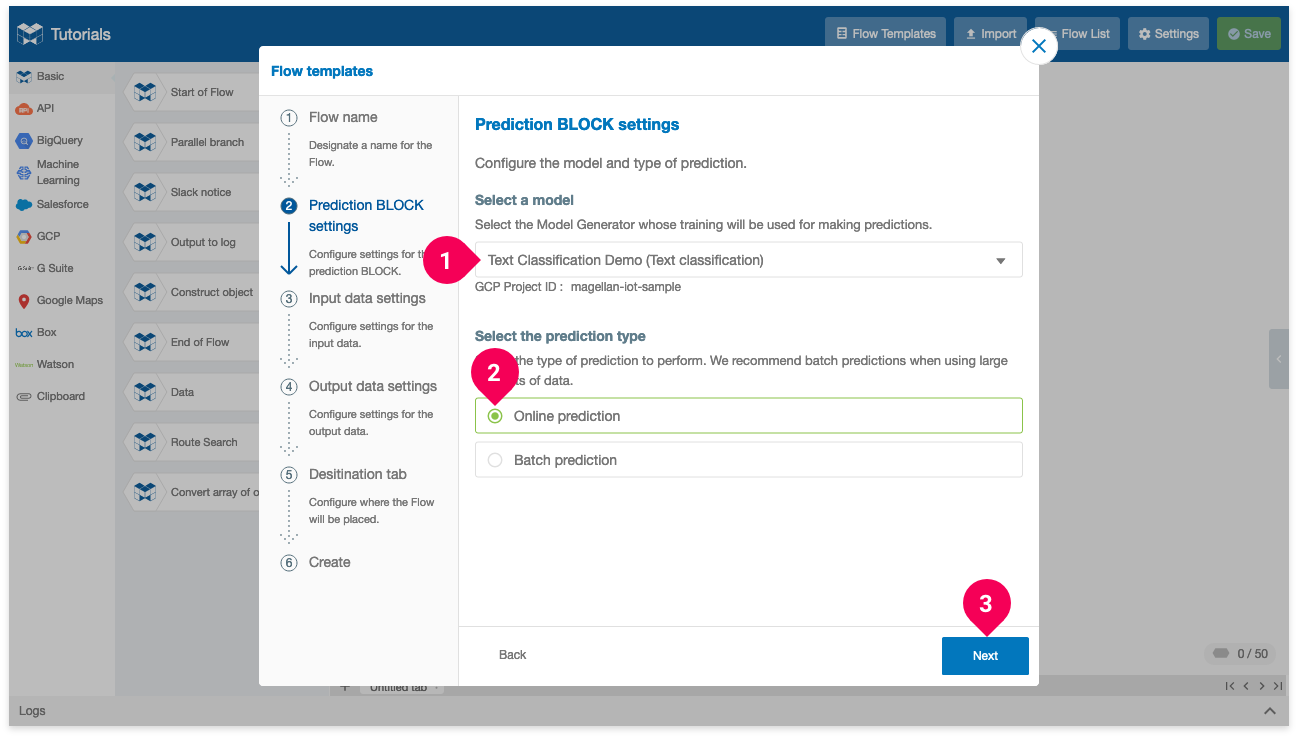
- Click on the Model Generator that you created for this tutorial. We used the name Text Classification Demo.
- Click Online prediction.
- Click Next.
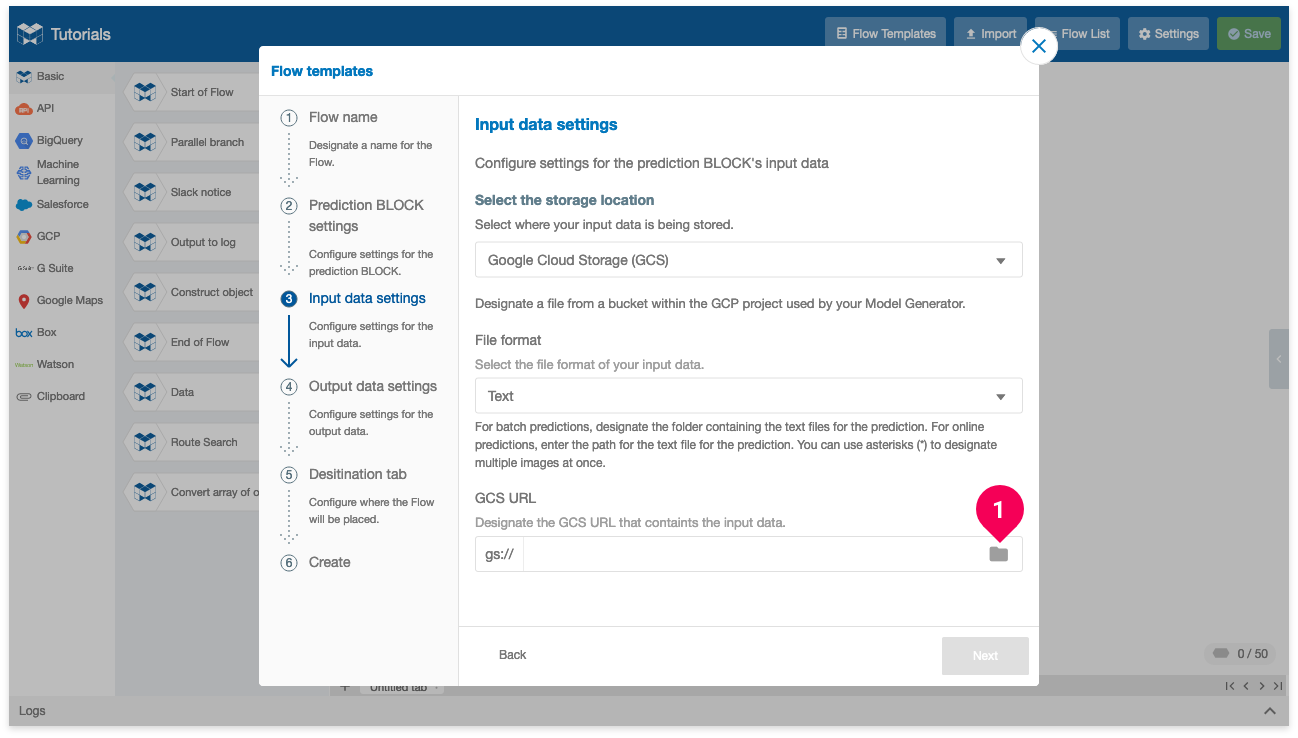
- Click the folder icon (folder ).
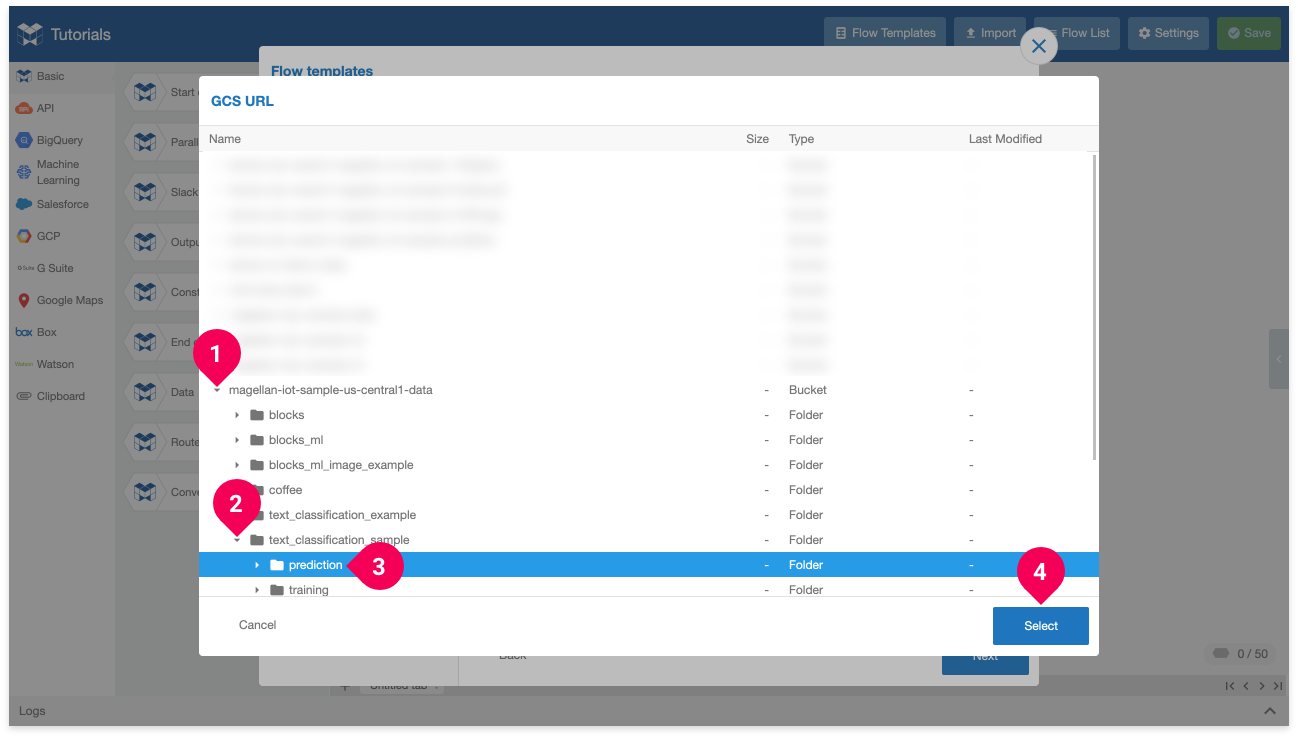
- Click the arrow icon (arrow_right) for the bucket that contains your prediction data. We used a bucket that ends with -data.
- Click the arrow icon (arrow_right) for folder text_classification_sample
- Click folder prediction.
- Click Select.
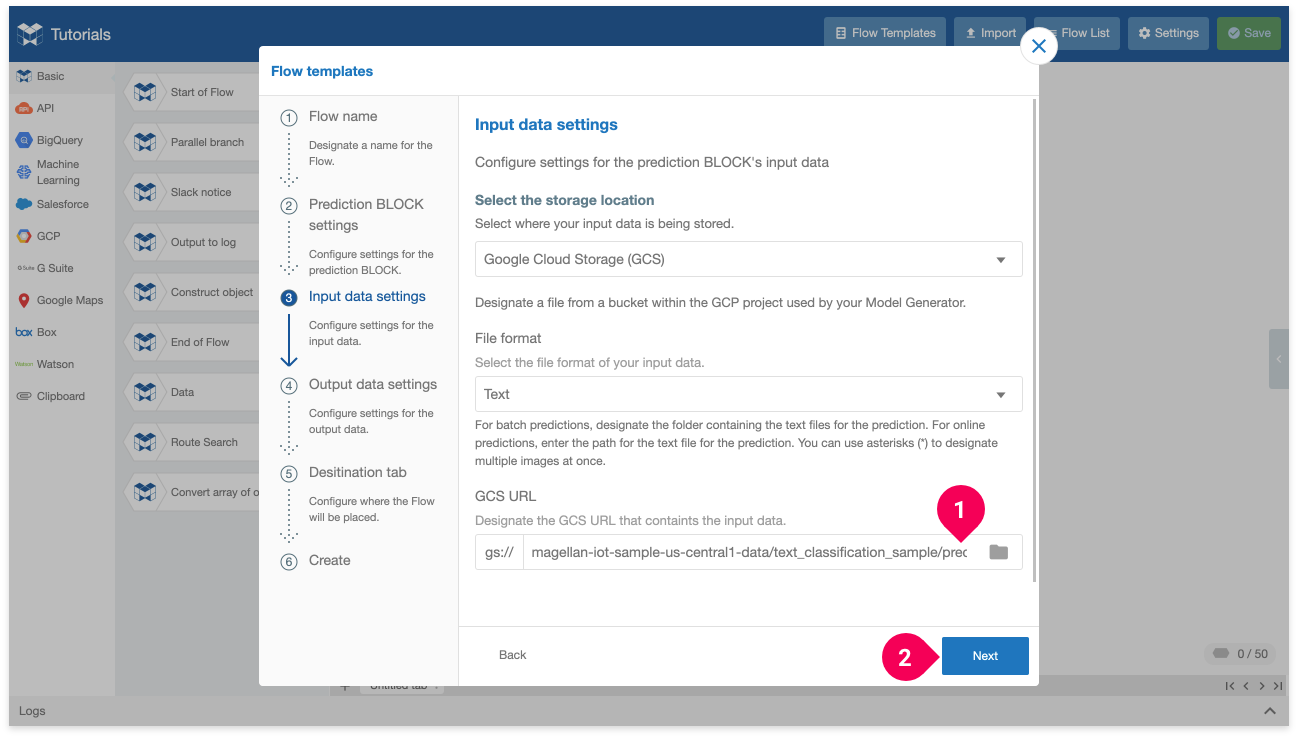
- Add a
*to the end of the GCS URL so that all the prediction data in the folder is used. For example: .../text_classification_sample/prediction/*) - Click Next.

- Select DataEditor for the storage location.
- Enter a name for identifying the data in the DataEditor. (Example shown above:
Author Prediction Results) - Enter the dataset that will store the results. (Example shown above:
tutorials_en) - Enter the table that will store the results. (Example shown above:
text_classification_tutorial_results) - Click Next.
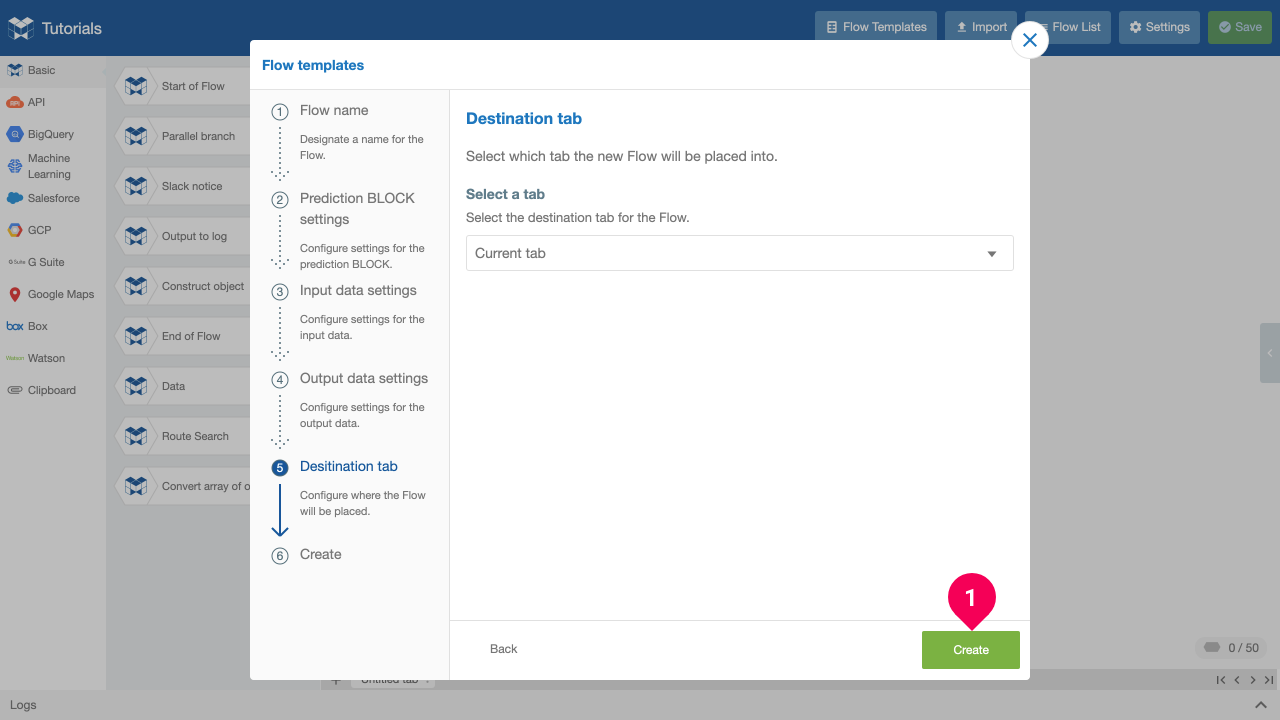
- Click Create.
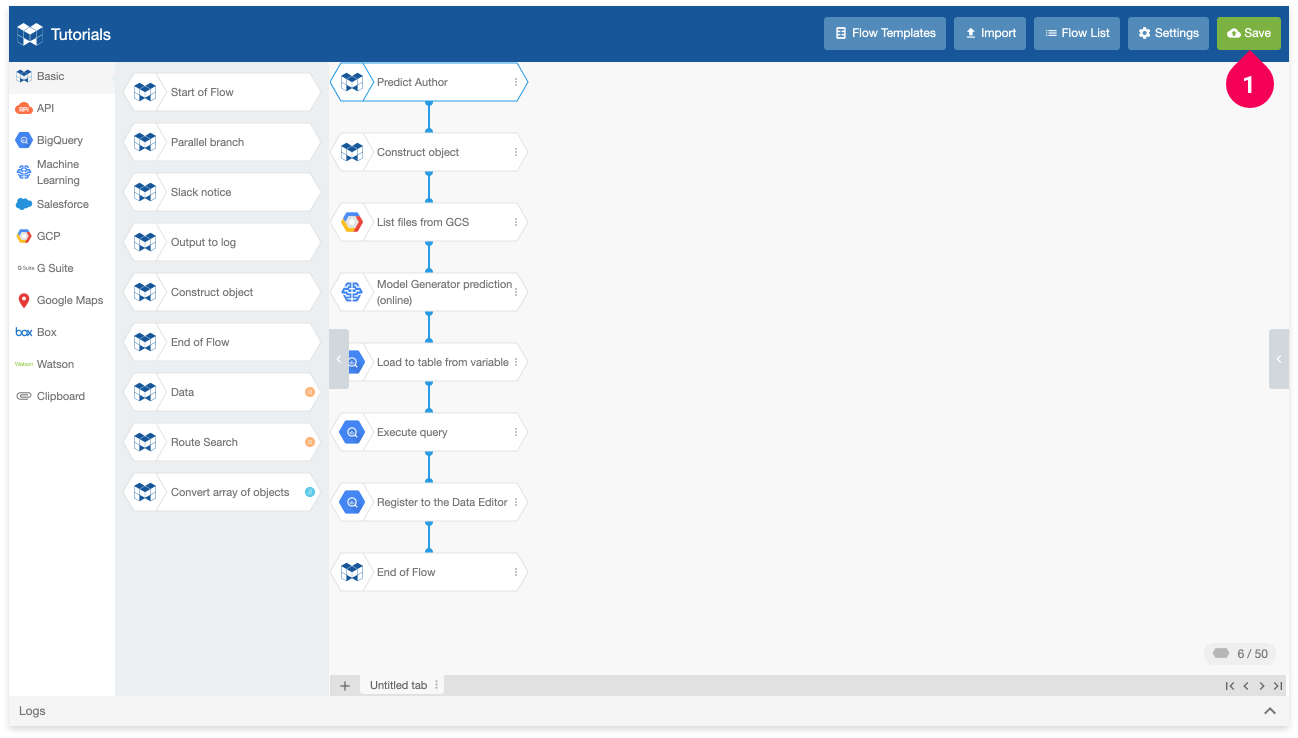
- Click Save.
info_outline Make sure to click Save after creating the Flow. You won’t be able to execute the Flow to make predictions unless you save. If you close the Flow Designer tab or your web browser without saving, the Flow will be lost.
Making predictions
We can now use the Flow to make predictions.
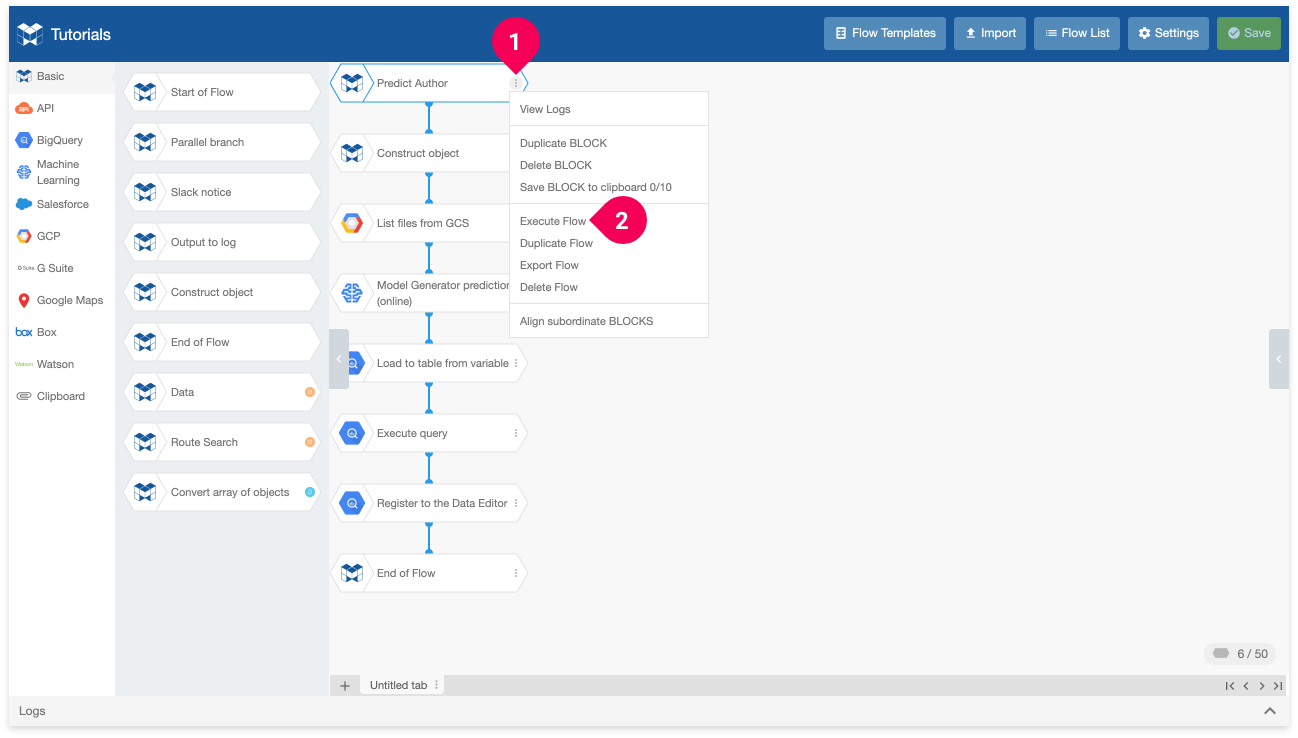
- Click the menu icon (more_vert) on your Start of Flow BLOCK (We named this BLOCK Predict Author).
- Click Execute Flow.
We can view the Logs section to check on the status of our Flow as it executes.
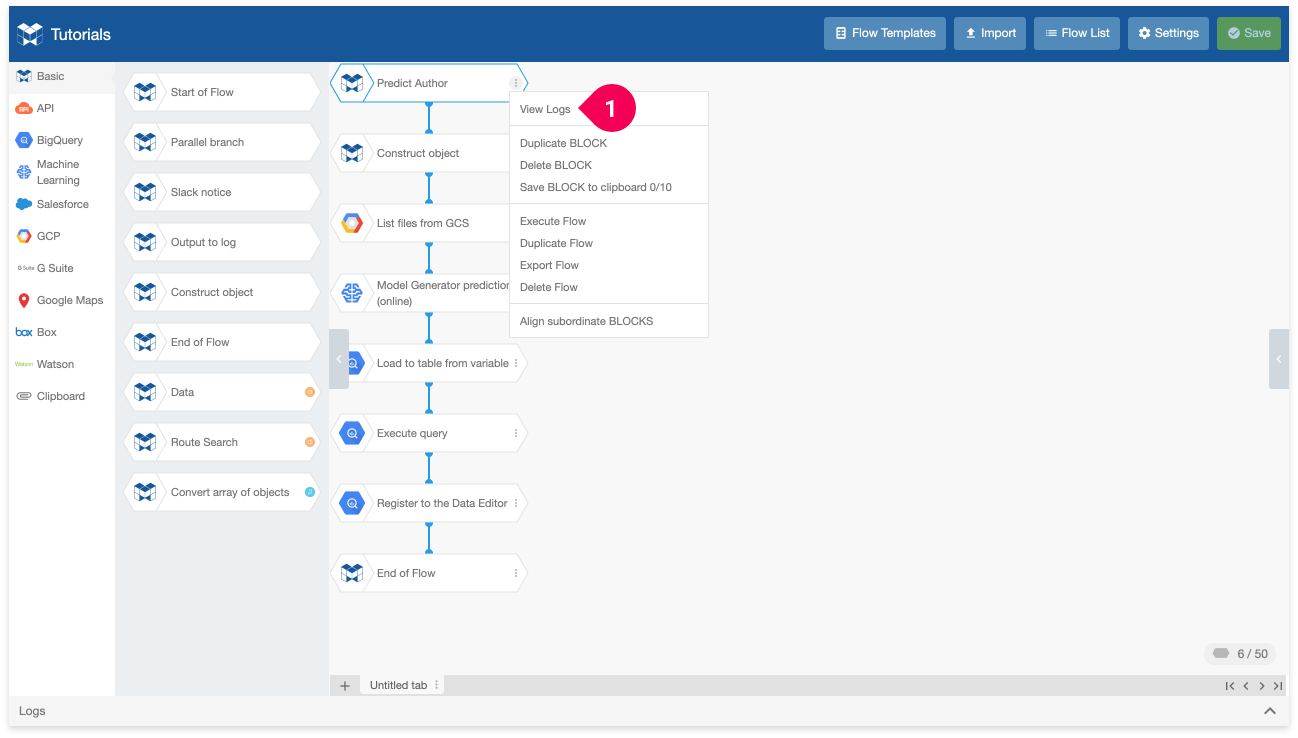
- Click View Logs.
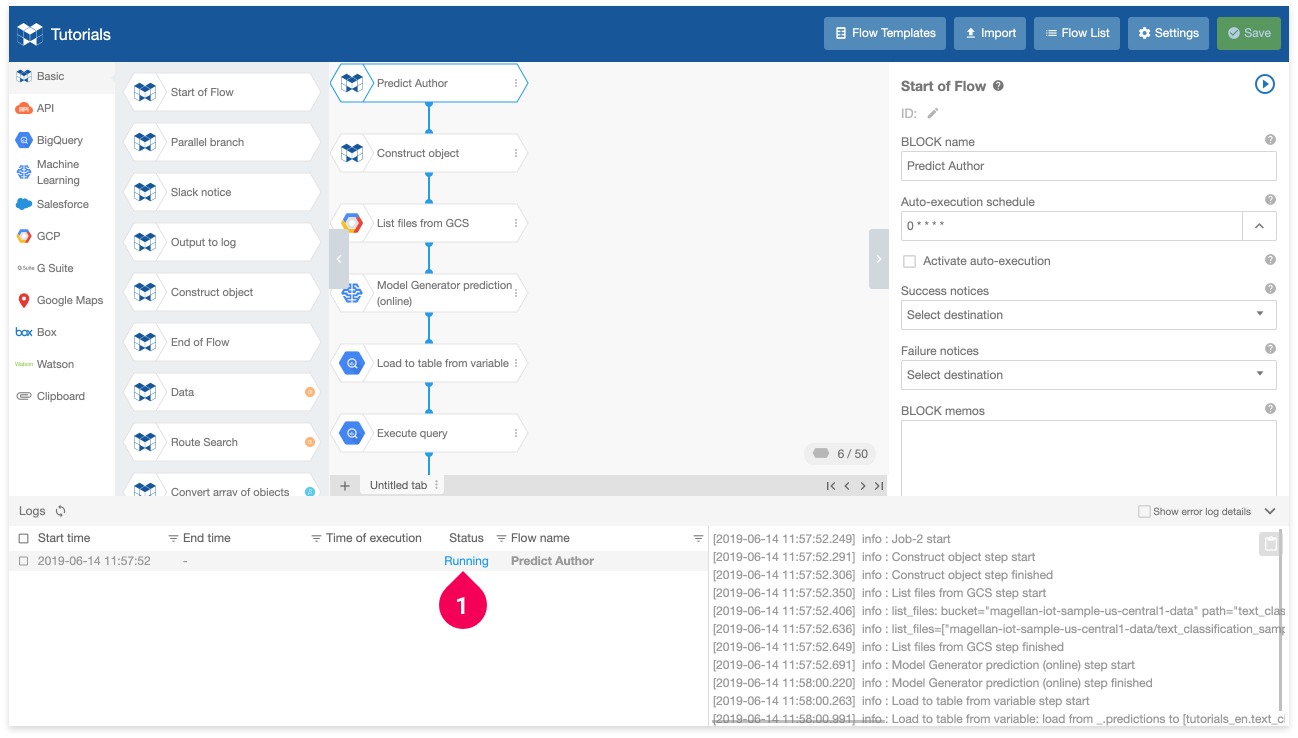
- Confirm that the Flow’s status is Running.
The Flow will take a bit of time to run.
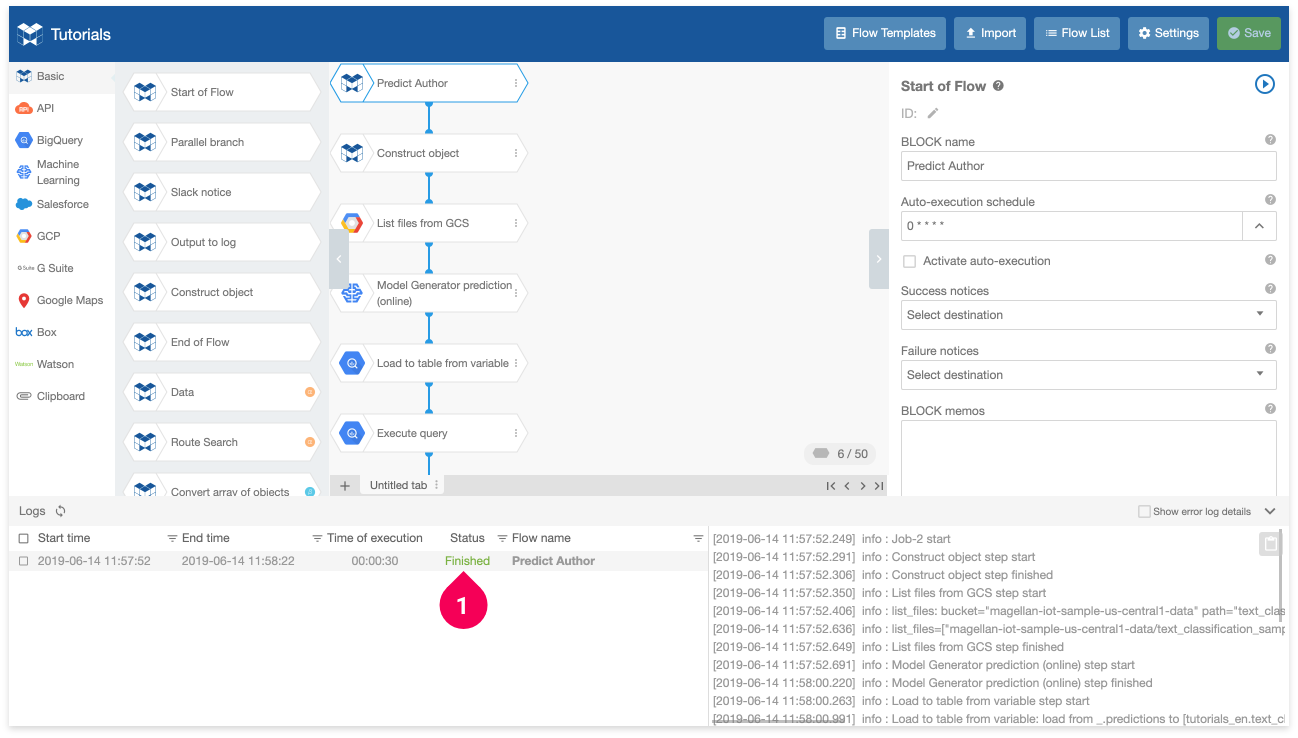
- Wait until the status changes to Finished.
Once this happens, the Flow has successfully executed.
If the Flow fails to execute successfully, refer to In case of an error for help determining the cause of the error.
Checking the prediction results
When we used the Flow Template to create the Flow, we configured for the results of the prediction to be sent to the DataEditor. To check the results in the DataEditor, switch back from the Flow Designer to the BLOCKS tab. We had previously left it on the Flow Designer list page.
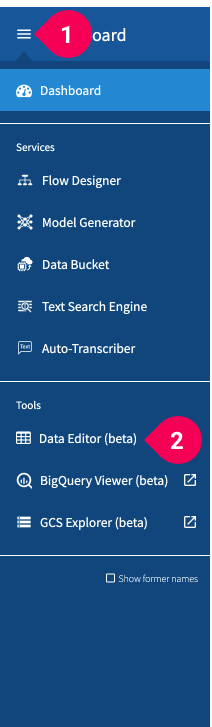
- Click the menu icon (menu) in the global navigation bar.
- Click DataEditor.

- Click the name you configured for the results. We used Author Prediction Results.
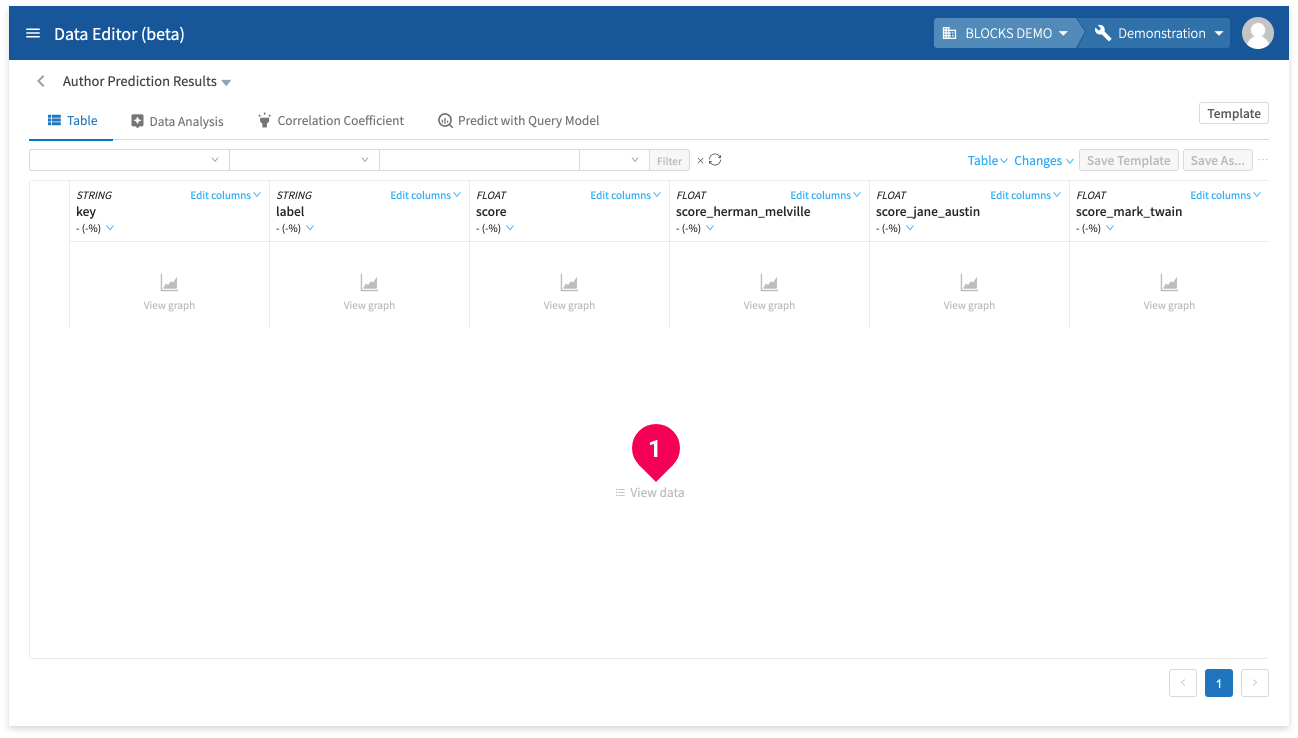
- Click View data.
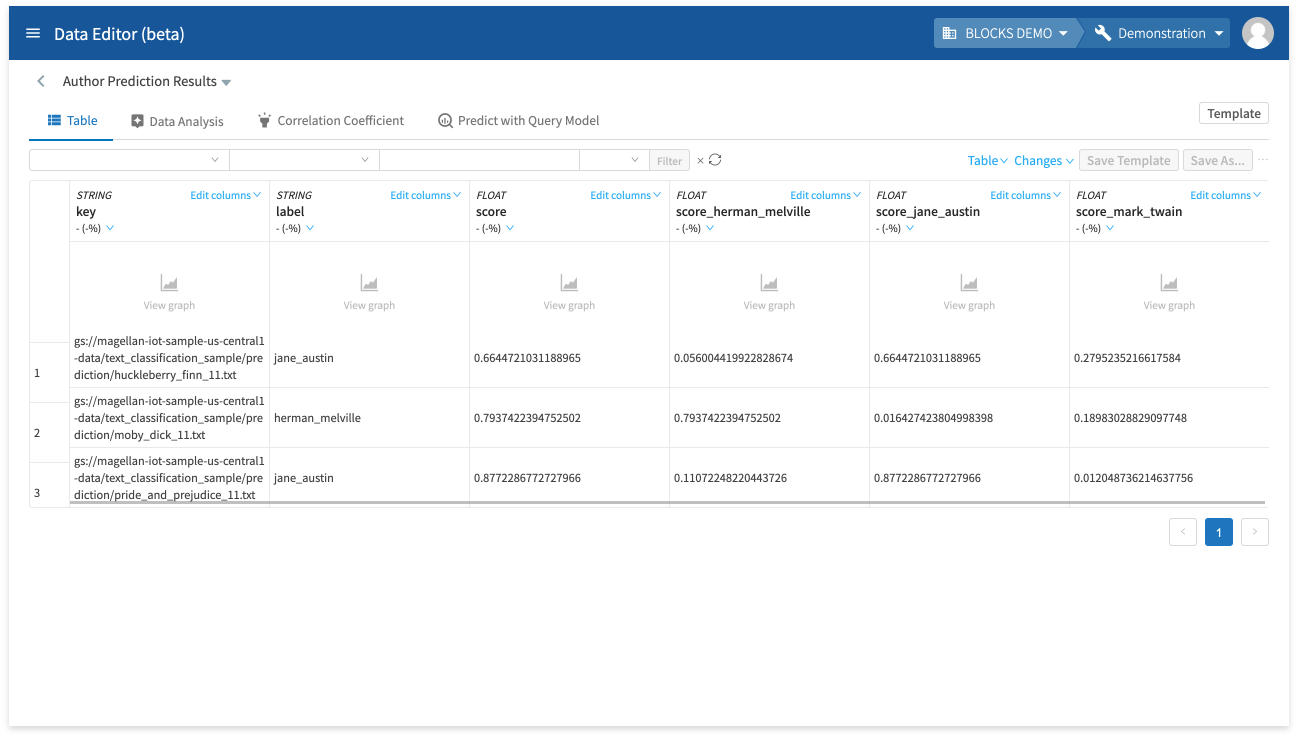
The following chart explains the meaning of each column:
| Name | Explanation |
|---|---|
| key |
The GCS URL for a prediction text file. |
| label |
The predicted label. In this example, we configured our labels as the following:
|
| score |
The confidence level for predicting the label. This is shown as a number between 0–1 with 1 signifying 100% confidence. |
| score_herman_melville score_jane_austin score_mark_twain |
The confidence level for each possible label. These are shown as numbers between 0–1 with 1 signifying 100% confidence. |
You can export data from the DataEditor as a CSV file by doing the following:

- Click the Table menu.
- Click Export table.
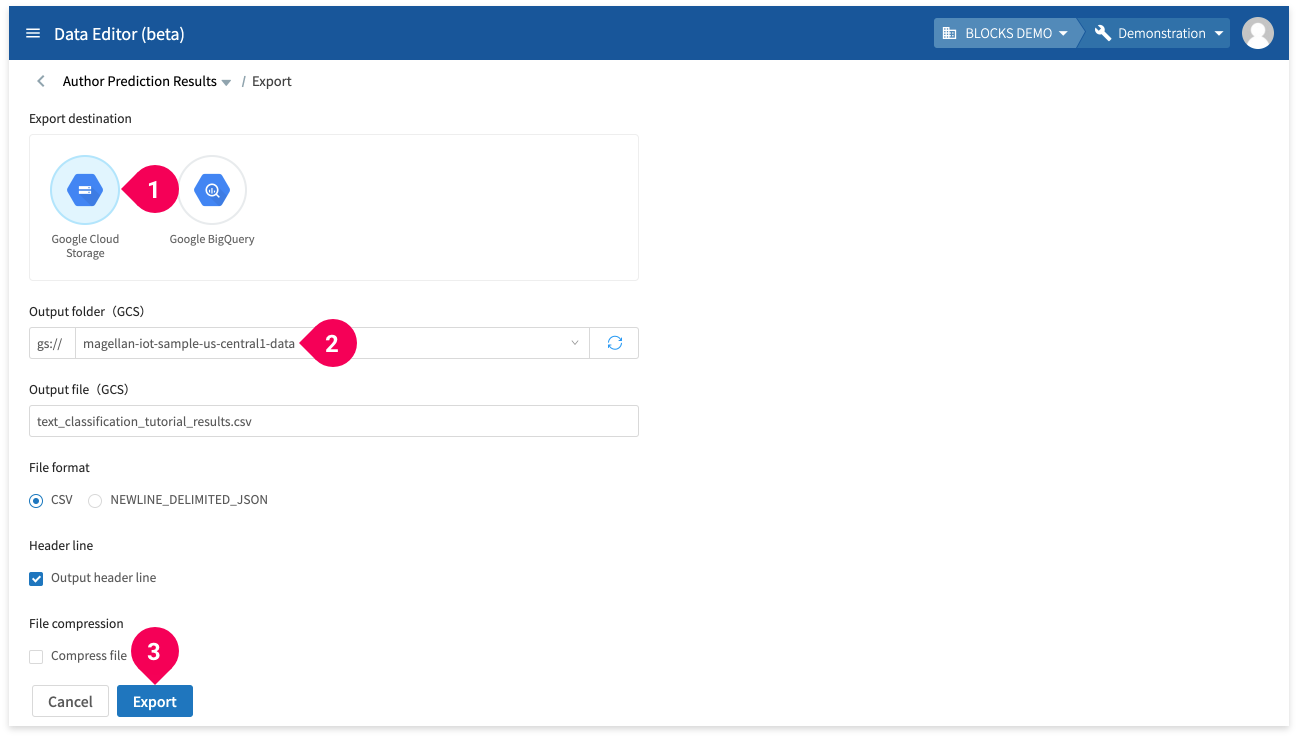
- Select Google Cloud Storage for the export destination.
- Select the GCS folder that will store the CSV file. We used the one that ends with -data.
- Click Export.
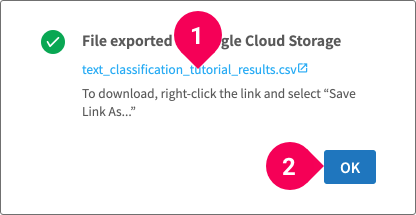
- Click on the file name to download the CSV to your PC.
- Click OK.
In case of an error
If an error occurs during the Model Generator’s training, you can find the error logs by doing the following:
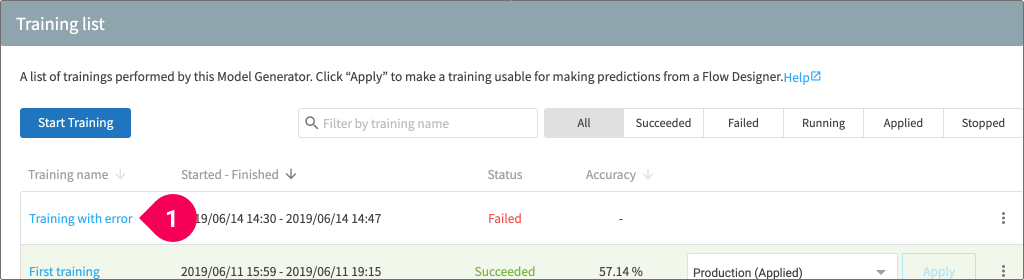
- Click on the name of the training whose status is Failed.
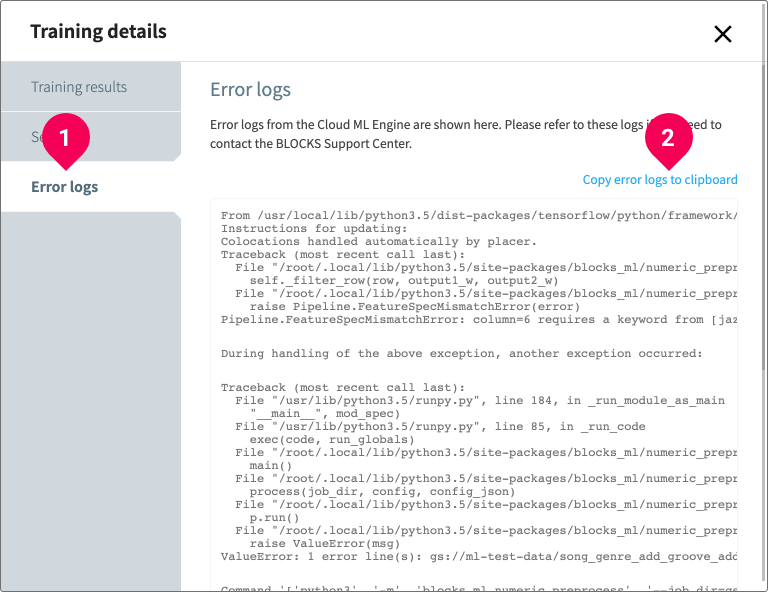
- Click Error logs.
- Click Copy error logs to clipboard (if you will contact BLOCKS Support).
If an error occurs while using the Flow Designer, you can find the error logs by checking the Logs panel.
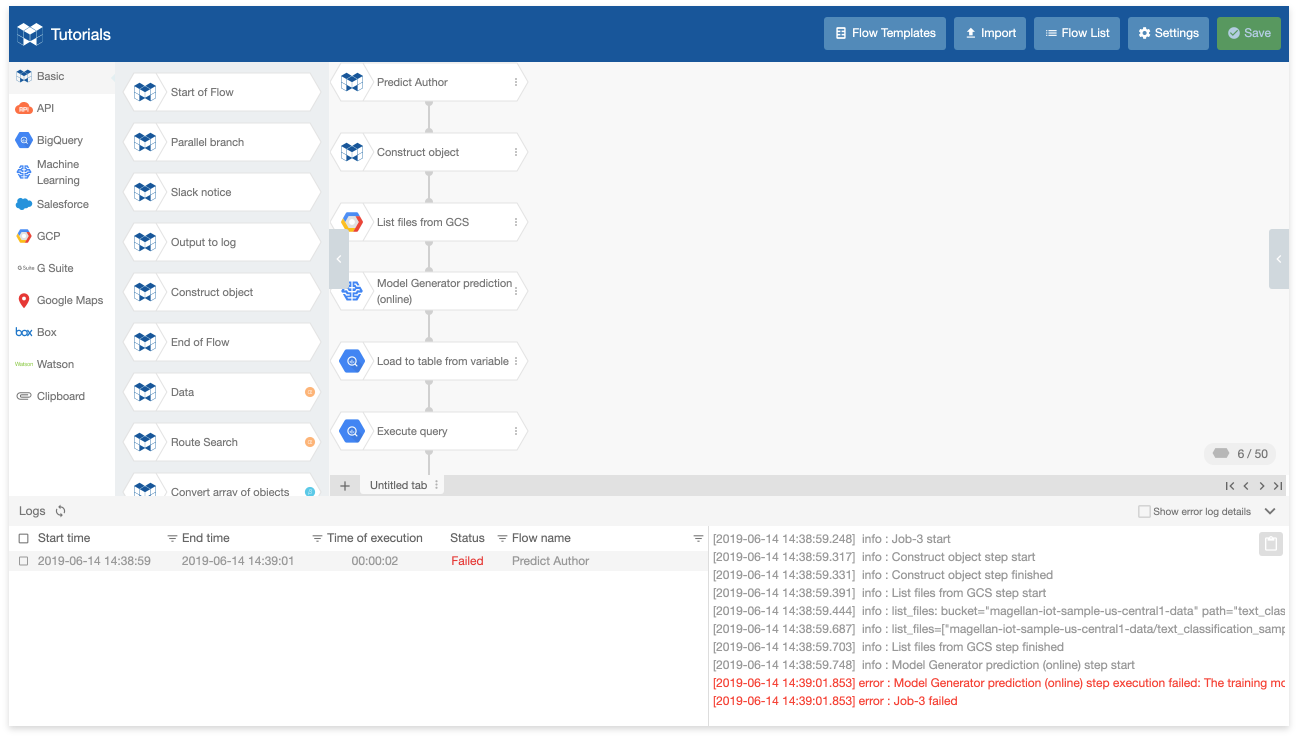
Error messages are shown in red.
To determine the cause of an error, it’s often helpful to read the logs before and after the red error message.
If you encounter an error that you cannot solve after several attempts, you can contact the BLOCKS support team by clicking your user icon in the right side of the global navigation bar and selecting Contact Us. For errors in a Model Generator, please copy the entire contents of the error logs—not just the red lines—and include these as a text file when you send your message.
For errors in a Flow Designer, click the Show error log details checkbox in the Logs panel of the Flow designer, then copy the logs. You should also export your Flow as a JSON file and include this as an attachment in your message to BLOCKS support.
info_outline For more details on contacting BLOCKS support, refer to the Basic Guide: Contact Us page.
Summary
With BLOCKS, you just need to prepare text files into labelled folders to get started with text classification machine learning.
As a final note, the following are some things to keep in mind regarding text files you can use with BLOCKS:
- Place text files for training into separate folders for each label (category) that the model will classify.
- Only the first 2,000 characters of each file are used during the training. You can use files with over 2,000 characters, but any characters past the first 2,000 will be ignored when training the model. If you want to use characters after the first 2,000 in the training, you will need to split the text into multiple files with less than 2,000 characters each.
- The text files should be UTF-8 without BOM.
- The text files should have the .txt extension.