Project settings
Creating projects
This page explains how to set up your second and any subsequent projects. For help setting up your first project, refer to Creating a project and purchasing licenses .
The process for creating new projects after your first project is as follows:
Click the project name at the top of the page to bring up the project list.
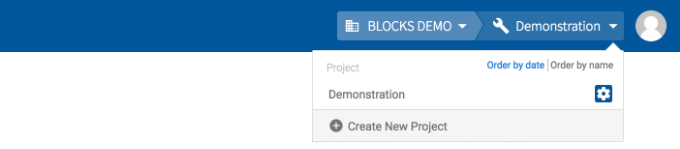
Click Create Project at the bottom of the list.
Enter a name for the new project.
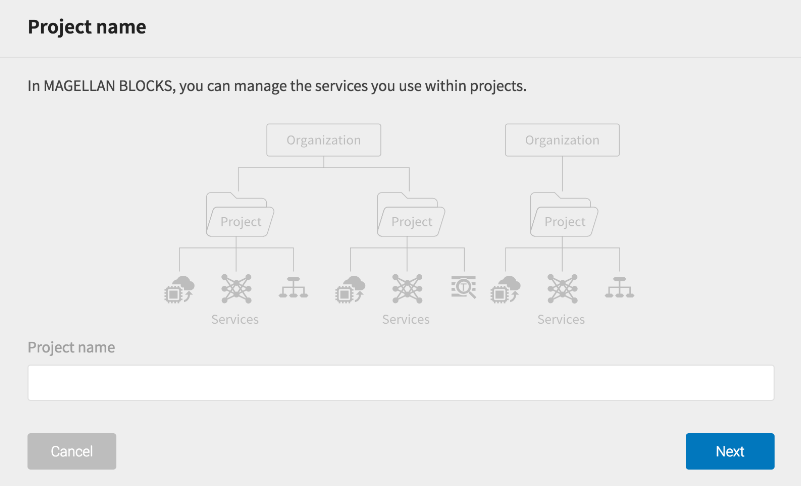
Click Next after entering the name.
Projects are units that can contain multiple services. You must always have at least one project.
Select a pricing plan.
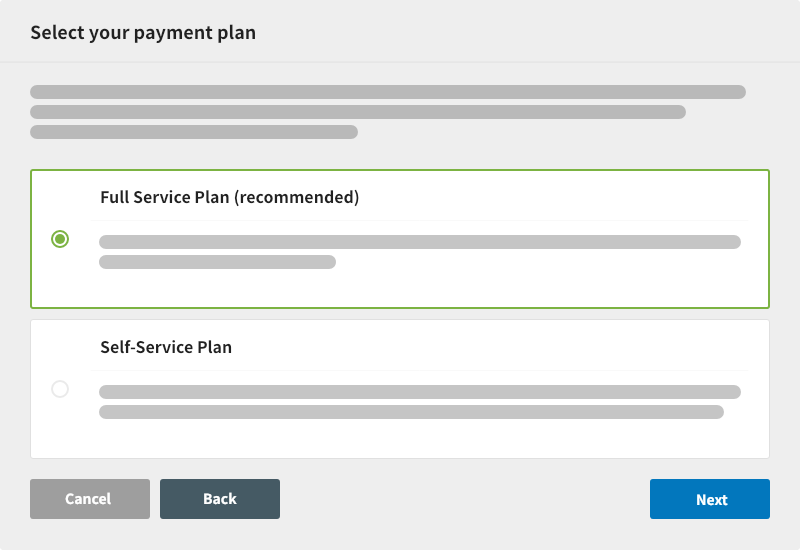
Choose between the Full Service Plan and Self-Service Plan then click Next.
Full Service Plan
Recommended for users unfamiliar with Google Cloud Platform (GCP). BLOCKS makes GCP’s many services easy for anyone to use, but this means a separate GCP account must be registered and maintained. We take care of everything on the GCP side for those who select this plan.Self-Service Plan
Select this plan if you prefer to manage your own GCP account. You will need to upload a GCP service account key file (JSON format) to use GCP services with BLOCKS.Upload a GCP service account key
This step is not shown for those who select the Full Service Plan.
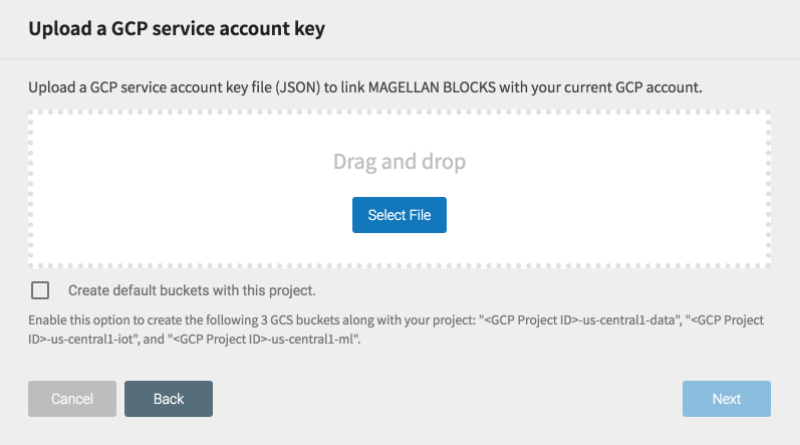
If you have selected the Self-Service Plan, you will be prompted to upload a GCP service account key. You can either drag and drop the file into the dialog box or click Select File.
If you check the option for Create default buckets with this project, the following three buckets will be created in GCS along with your project:
- <GCP Project ID>-us-central1-data
- <GCP Project ID>-us-central1-iot
- <GCP Project ID>-us-central1-ml
The default buckets have the following settings:
Default storage class Regional Location us-central1 Click Add after uploading your GCP service account key.
Click Submit on the confirmation screen to create the new project.